
Mentimeter is a presentation tool like PowerPoint but it has real-time interactivity. Mentimeter permits the presenter to add quizzes and questions into a presentation by using the features of Mentimeter.
In real-time, those who are watching the presentation can participate in the quizzes using any of the browsers on their phone or tablet and answer the questions or can provide written feedback because it is compatible with any of the devices. There is no need for installation.
Both ‘audience pace’ or ‘presenter pace’ can be set in the Mentimeter.
Mentimeter defines it as an interactive presentation tool that makes users get active with their audience in real-time.
Mentimeter is an online teaching tool that helps users to create interactive presentations and meetings wherever they are. Now remote learning is increasing steadily and tools like these make learning much more interesting and interactive. So let’s see in detail about this learning tool.
To open Mentimeter just go to www.mentimeter.com
Mainly there are 4 steps to complete the login process:-
Step 1: Once you open the website, before creating presentations the user needs to complete the registration process by clicking on sign up. If you already have an account you can click on login and login with your email id and password.

To create a new account just click on the sign-up. You can sign up with Facebook or with google or using your email id.

The easiest way is to sign up with google.
 Step 2: After signing up they will ask a few questions to improve the value you get from the tool. You may choose “Education” and click on the “Save selection” button.
You may choose your role as “Educator” if you are an educator and click on the “Save selection” button.

Step 3: Next You may choose your goals for using Mentimeter. You may choose “Engagement” and click on the “Save selection” button.
 Step 4: Then they are asking us to choose a plan. There are four types of plans: free, basic, pro, and enterprise.
The features and pricing vary in each plan and it is worth knowing that we can have an unlimited audience, unlimited presentations, up to two question slides, and up to five quiz slides in the free account.
 If you are a beginner, a free account is more than enough. So let us try out the free account for now. For that click on “continue with free”.

If you are a beginner, a free account is more than enough. So let us try out the free account for now. For that click on “continue with free”.
After that, you can view the below page. After closing all the Pop-ups, you may start using the tool.
 How to Create a New Presentation in Mentimeter
For creating a new presentation click on the “+New presentation” button.

Create a new presentation by entering a name for your presentation and then click on the “Create Presentation” button.

Then you get a slide with a code number and QR code bar, this code should be shared with other persons during the presentation. This is one of the options to share the presentation with other persons.

After that add a new slide to your presentation.
 On the right side, you can see different types of features of Mentimeter, you can add these features based on your requirements. Under the “Type” menu, it is categorized into 4. They are:


Each category has its features for making the presentation more interesting.
Now let’s try creating our first presentation on Mentimeter. On the right-hand side of the screen, you can see many options to design your presentation and make it interactive.
Under the tab “Type” you can set popular question types like multiple choice, word cloud, open-ended, scales, ranking, Q&A.

Under “Quiz competition” you have “select answer” and “type answer”.

Under “Content slides” we have a heading, paragraph, bullets, image, video, big, quote, and number.

If you simply mouse over those options you can see the preview in the presentation slide.

Under “Advanced questions” we have template slides like 100 points, 2*2 grid, quick form, who will win? and pin an image.

So these are all different types of questions and templates to interact with your students
As an example, Let’s choose the multiple-choice type.

Then it will move automatically to the “Content” tab.
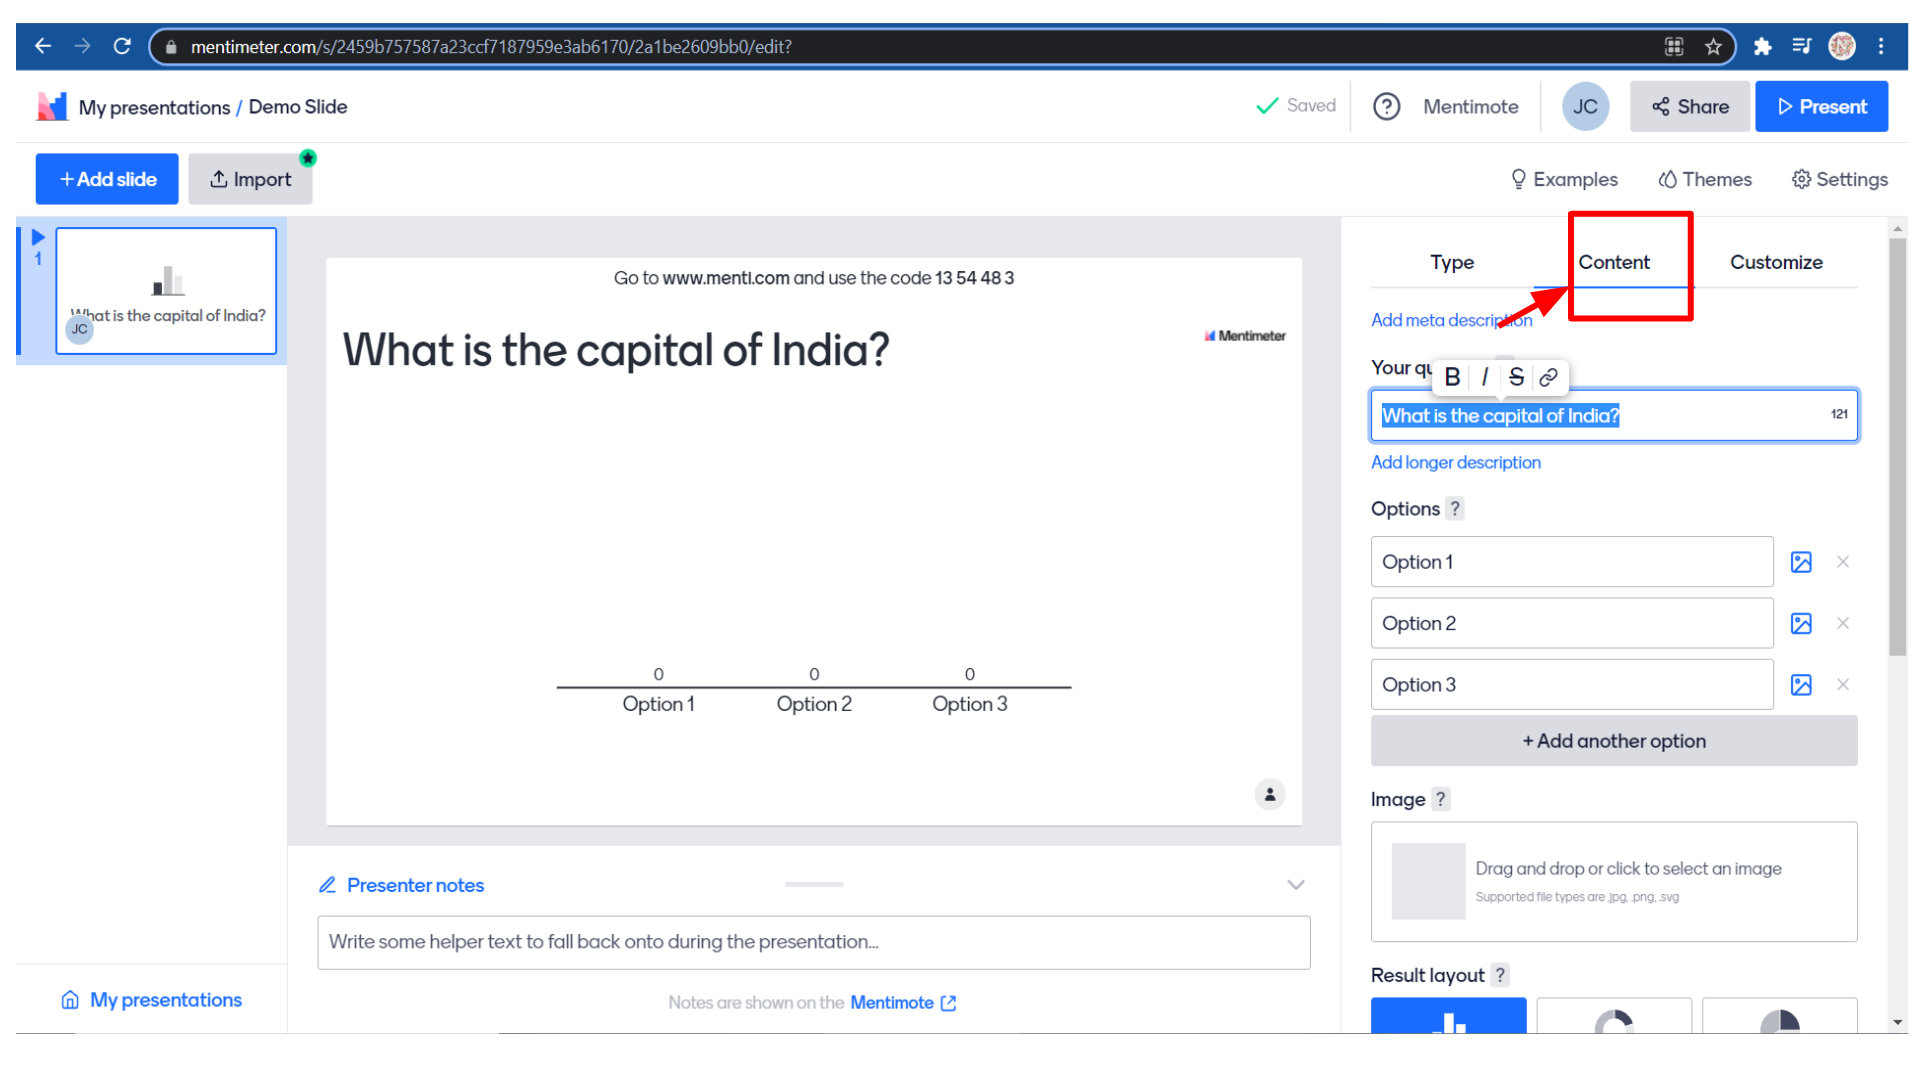
Under the “Content” menu, You can enter your question. So I’m just entering
“What is the capital of India?”
 You can edit this question by selecting it. You can bold it or change the font to italics, strikethrough, or even add a link.
 So let me show you how to add a link.
To add a Link, you just have to paste the link in the open brackets.
For Example:
[What is the capital of India?] ( https://worldpopulationreview.com/capitals/india )

After adding the link the question in the slide becomes a hyperlink. You can see the difference in the canvas itself. You can see that the title is now a hypertext.
 Now the students can click on this title and refer to the article. So when the student clicks on the link it will redirect to the page that is linked to the question.
Now the next one is adding options to the question. You can give different options. I’m adding Mumbai, New Delhi, and Chennai as options.

You can also add images to these options to make them more attractive. For that click on the image icon.
 You can also add images to these options to make them more attractive. For that click on the image icon.
Upload an image or choose an image from the image library or gifs.


I have added images for all the options and if you want to add another option you can click on “add another option”.

 To remove an option you can click on the cross mark.
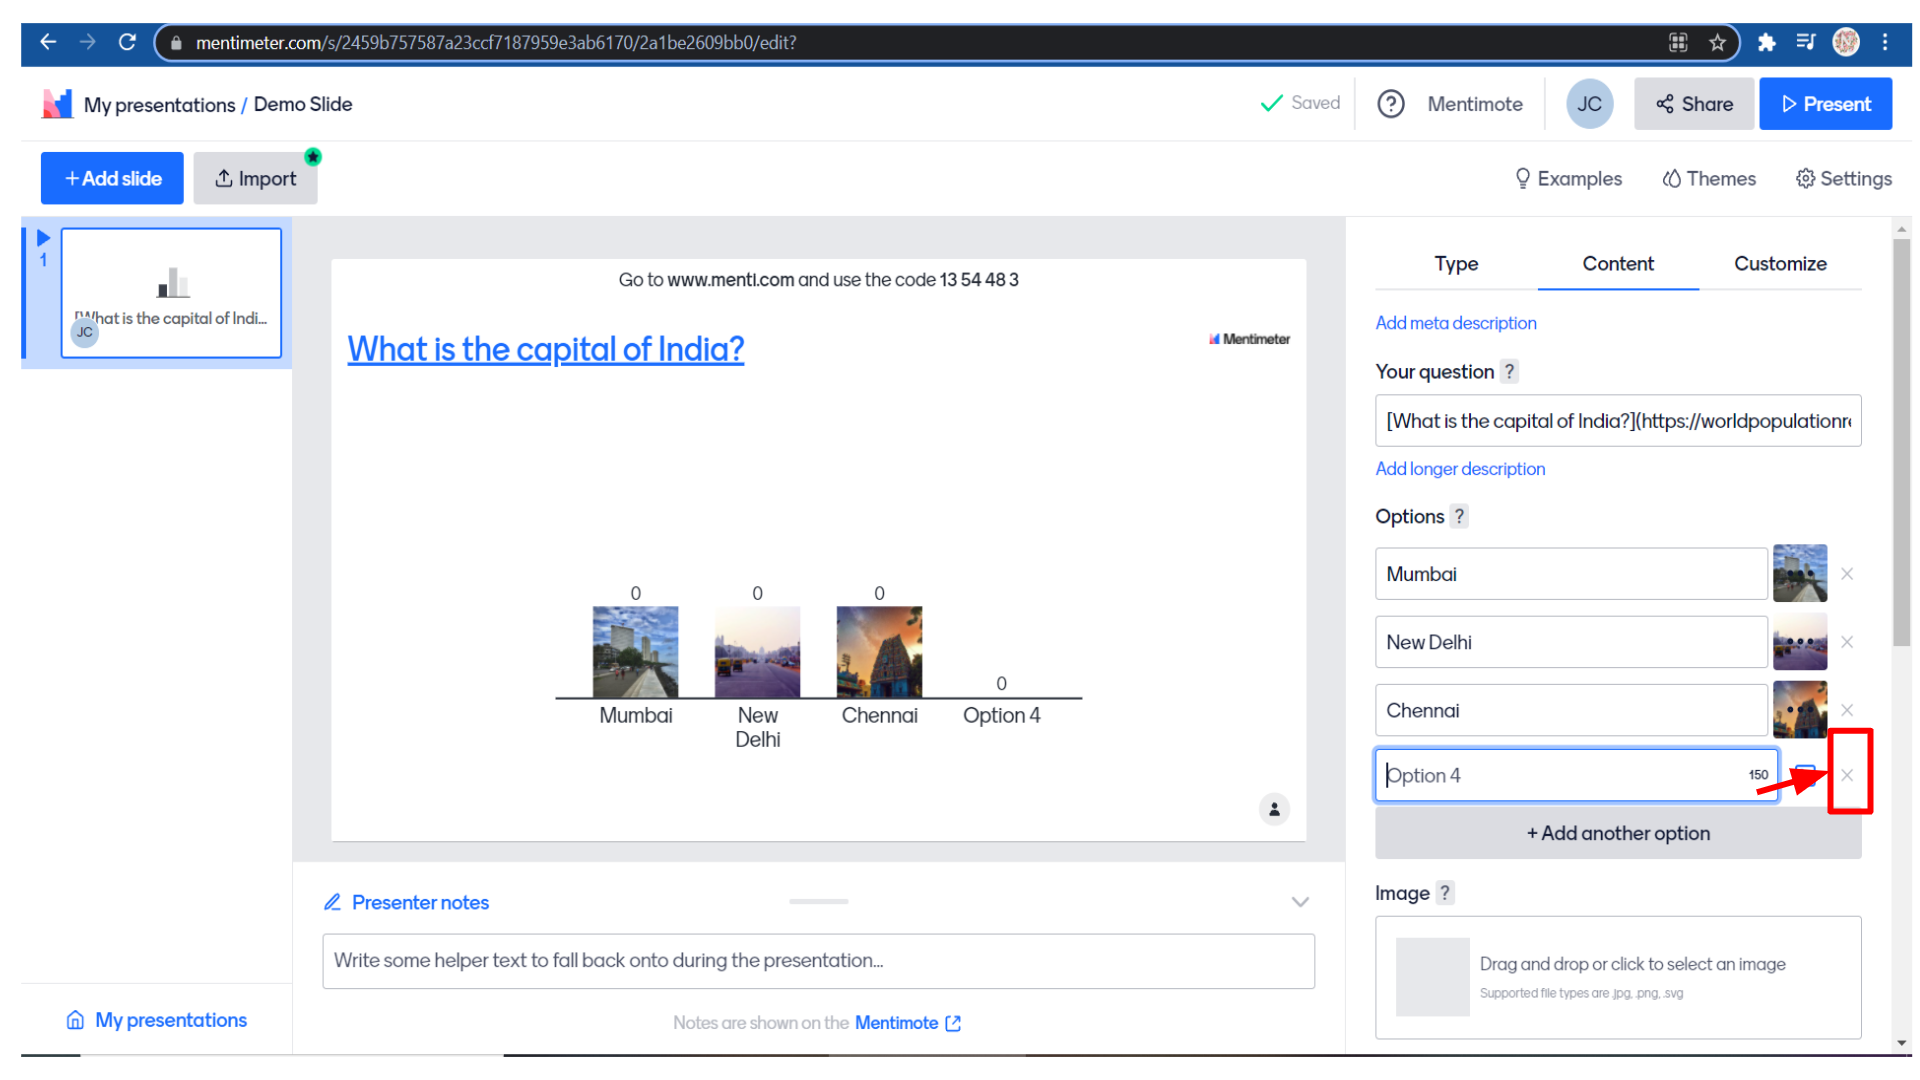
To add an image to the question slide just scroll down and you may upload an image there.
 So I am selecting an image.
 If you need you can crop the image and click on the “save” button.
 Now you can see the image on the slide.

You can also select the “result layout” as a bar chart or pie chart etc.
 Below you have some extra options like show correct answers.
 If you click on the toggle button you’ll be able to select the right answer.
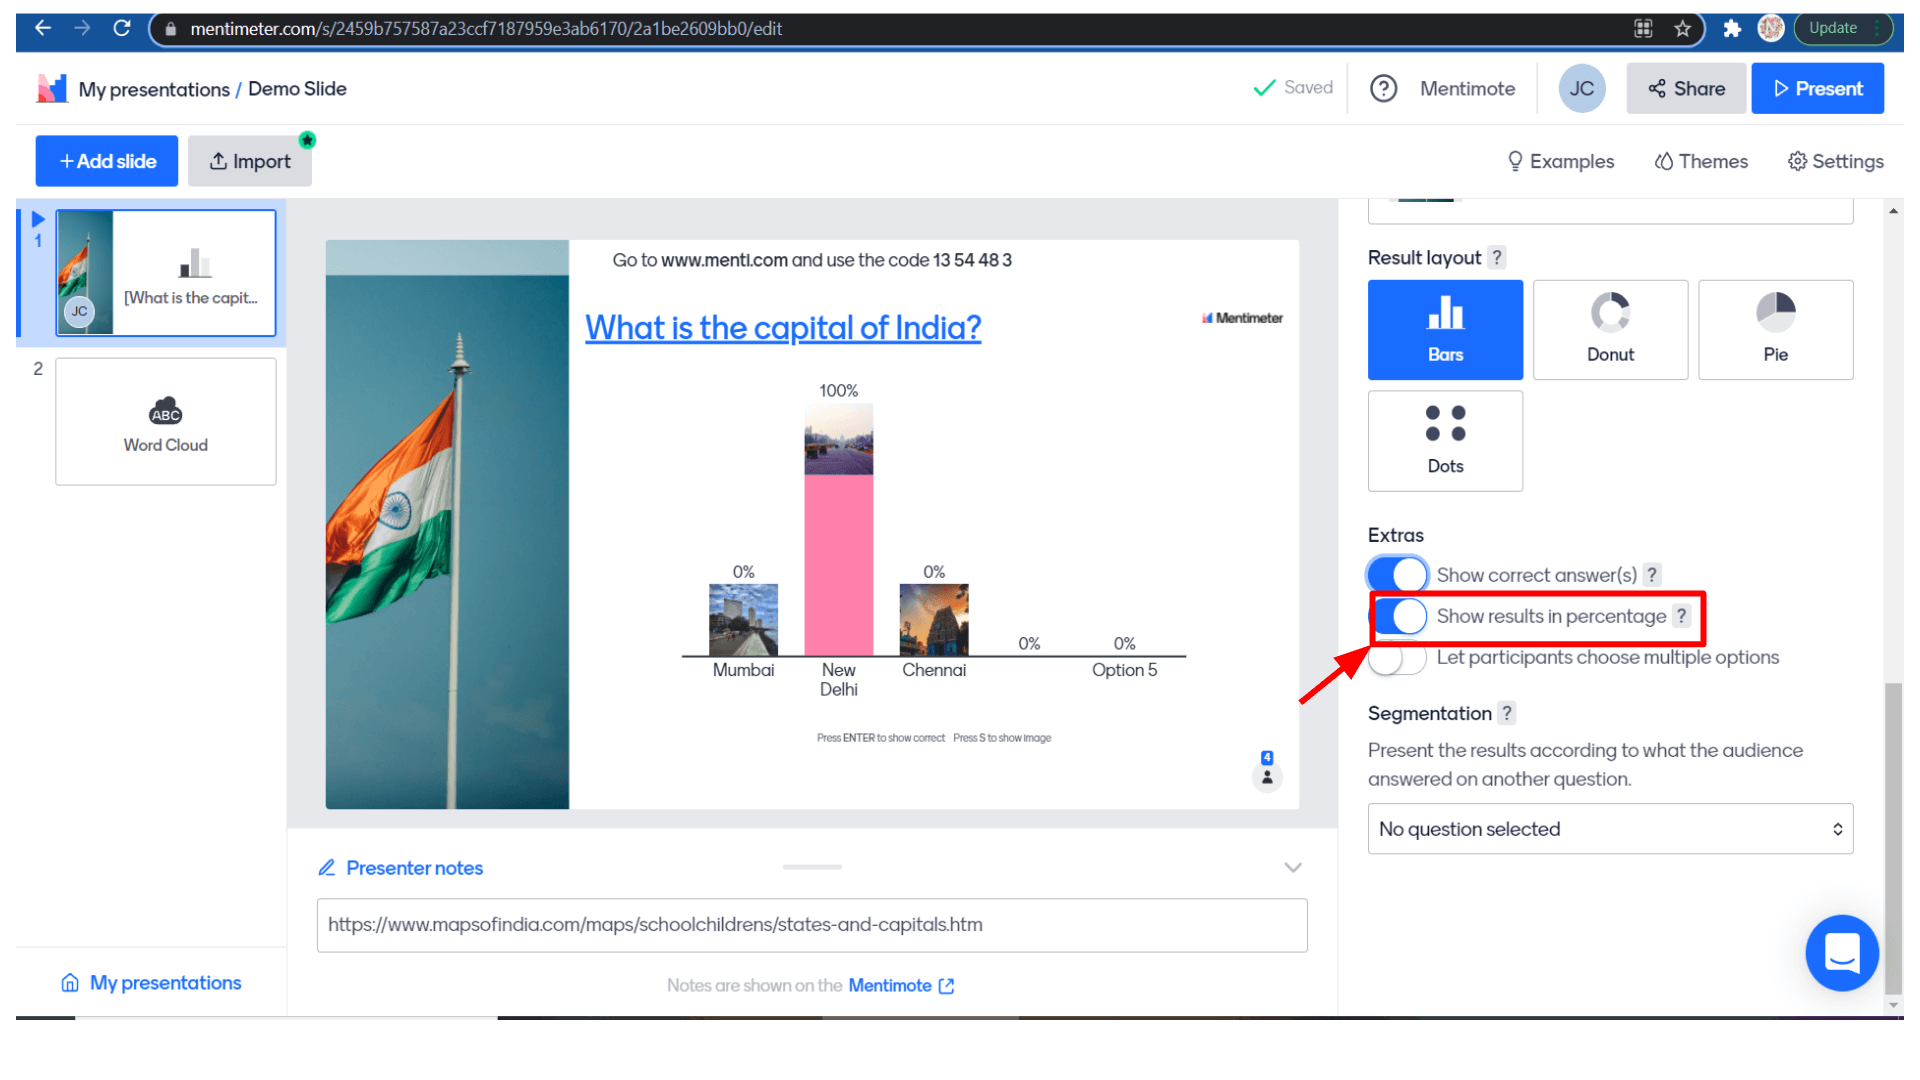 So here I’m selecting the right answer as New Delhi.

You also have some options like show results in percentage, let participants choose multiple-choice options.
 After that, you have an option to present the slide according to what the student has answered in the previous question.
 How to Customize Mentimeter Slides
The next tab is the “customize” tab where you can customize your slides according to your wish.

We have options to show images, close voting, hide instructions bar, hide results, etc.

There are so many layouts which you can choose from.
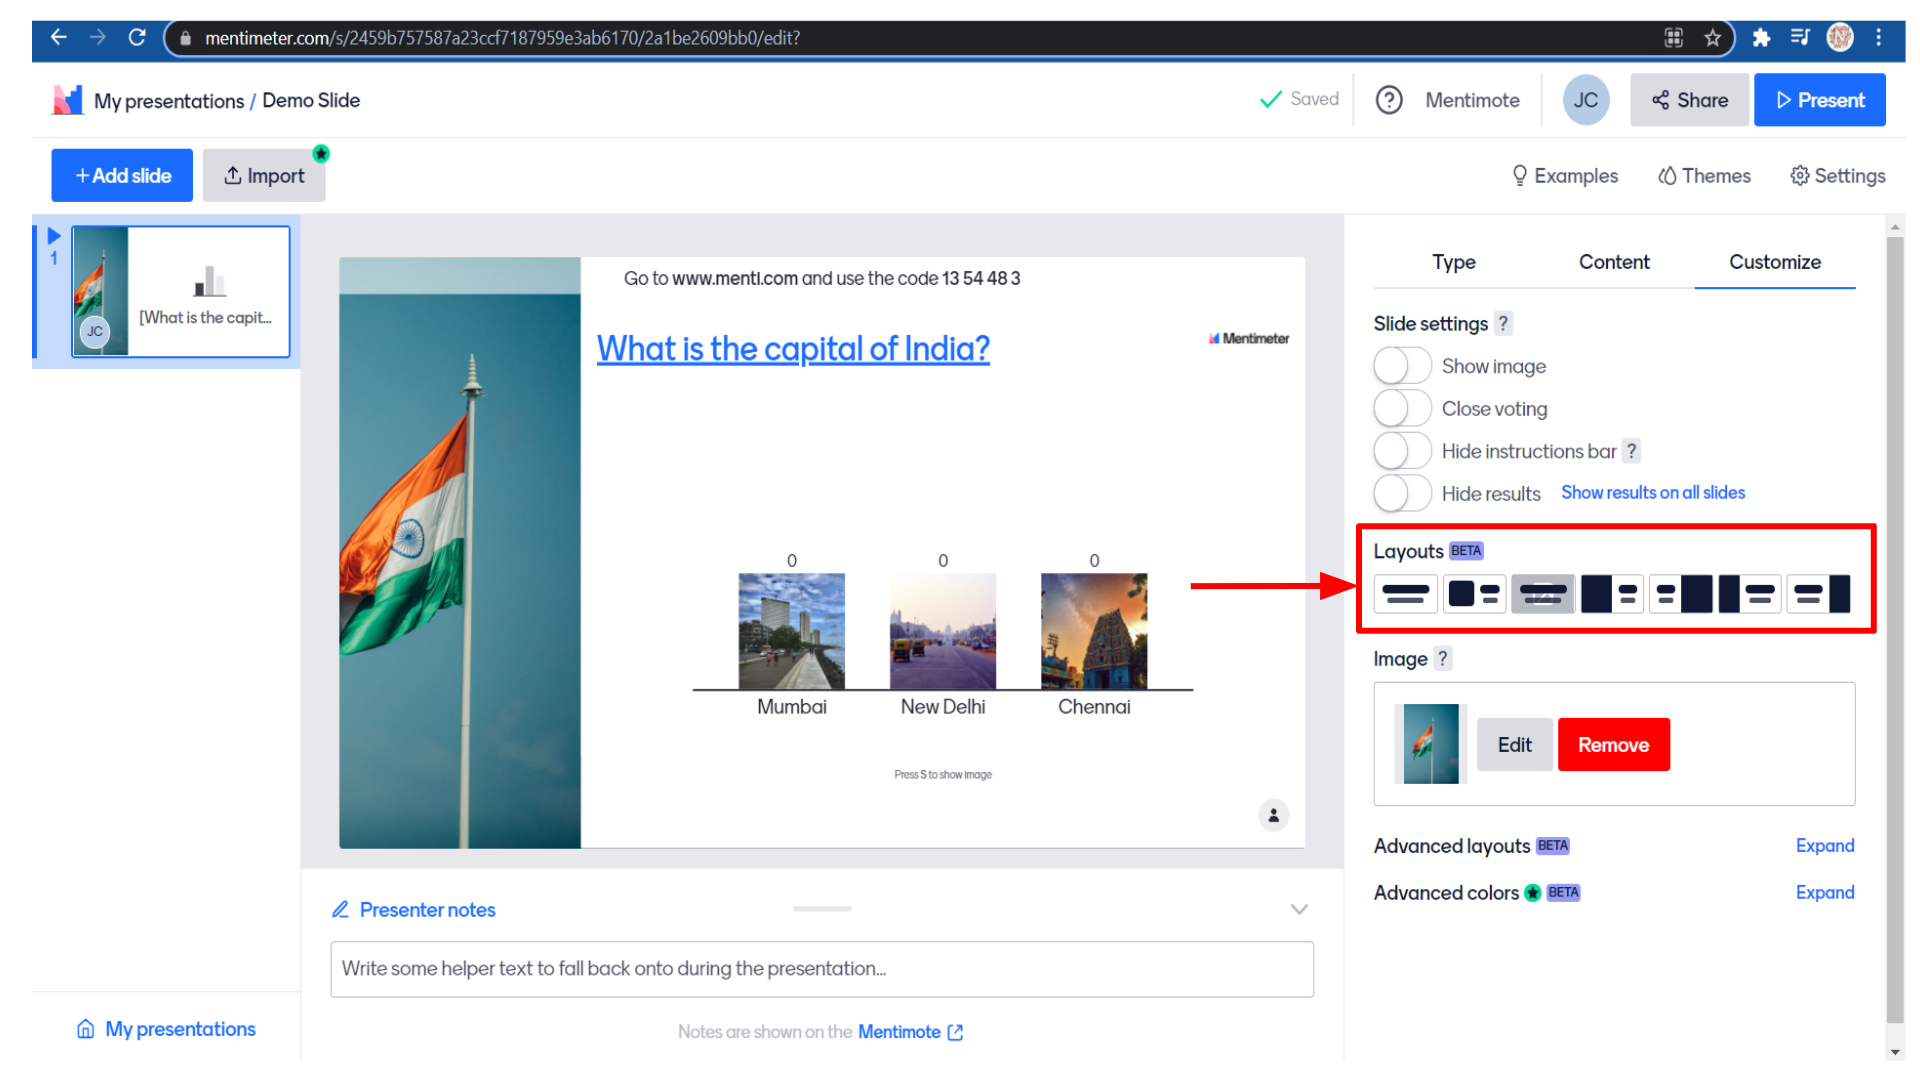 You also have the option to edit or remove the image.

Below that, we have advanced layout options and advanced colours options.
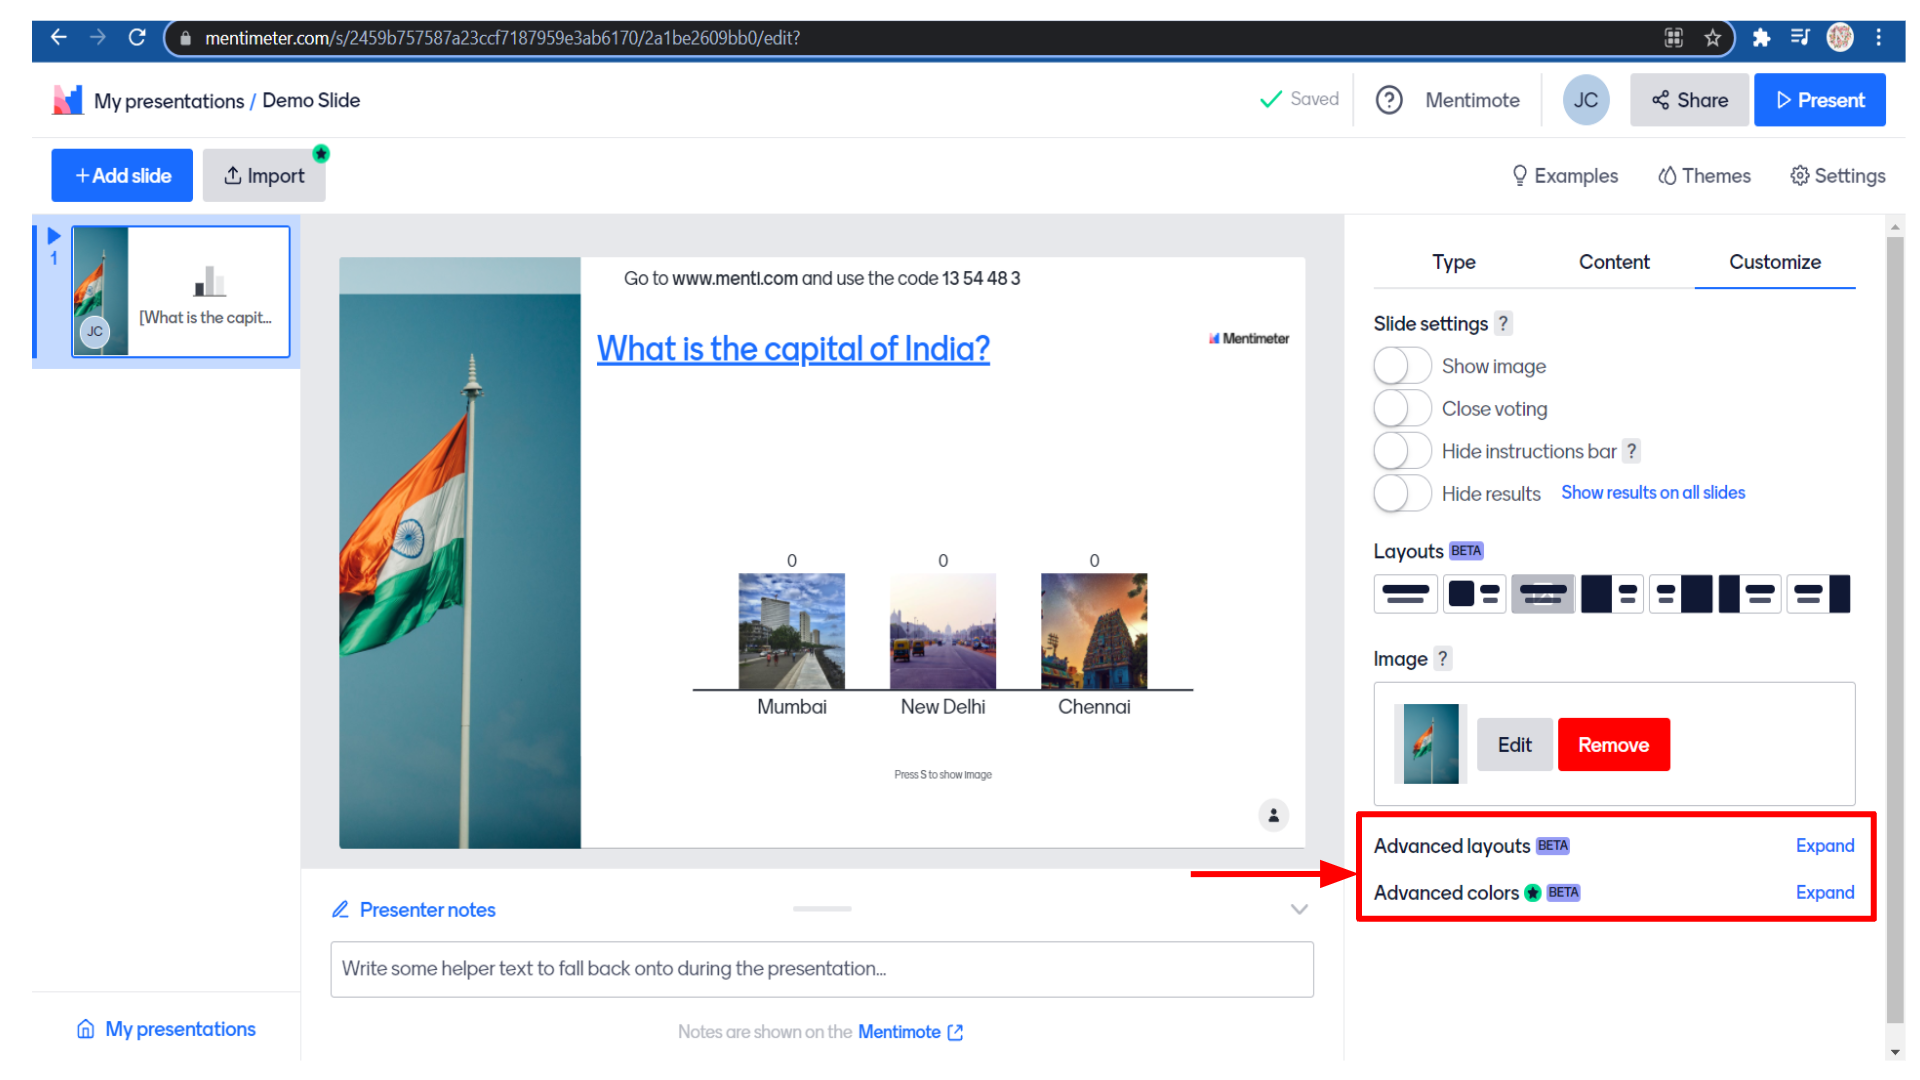
The advanced colours option is a pro element you have to upgrade your Mentimeter account to access this feature.

Once your presentation slides are ready you can share the slide with your students. For that click on the “share” button.

You’ll get a voting code that you can share with your students.

Students can go to www.menti.com and enter the voting code to vote for this presentation.

Otherwise, you can also copy the link and share it directly with your students.

You can also present the slide in a meeting like a google, zoom or any online meeting platform which you are using.

In this example, I am showing how to present the slide in a google meet. For that, you need to open google meet.

Come back and click on the “present” button.
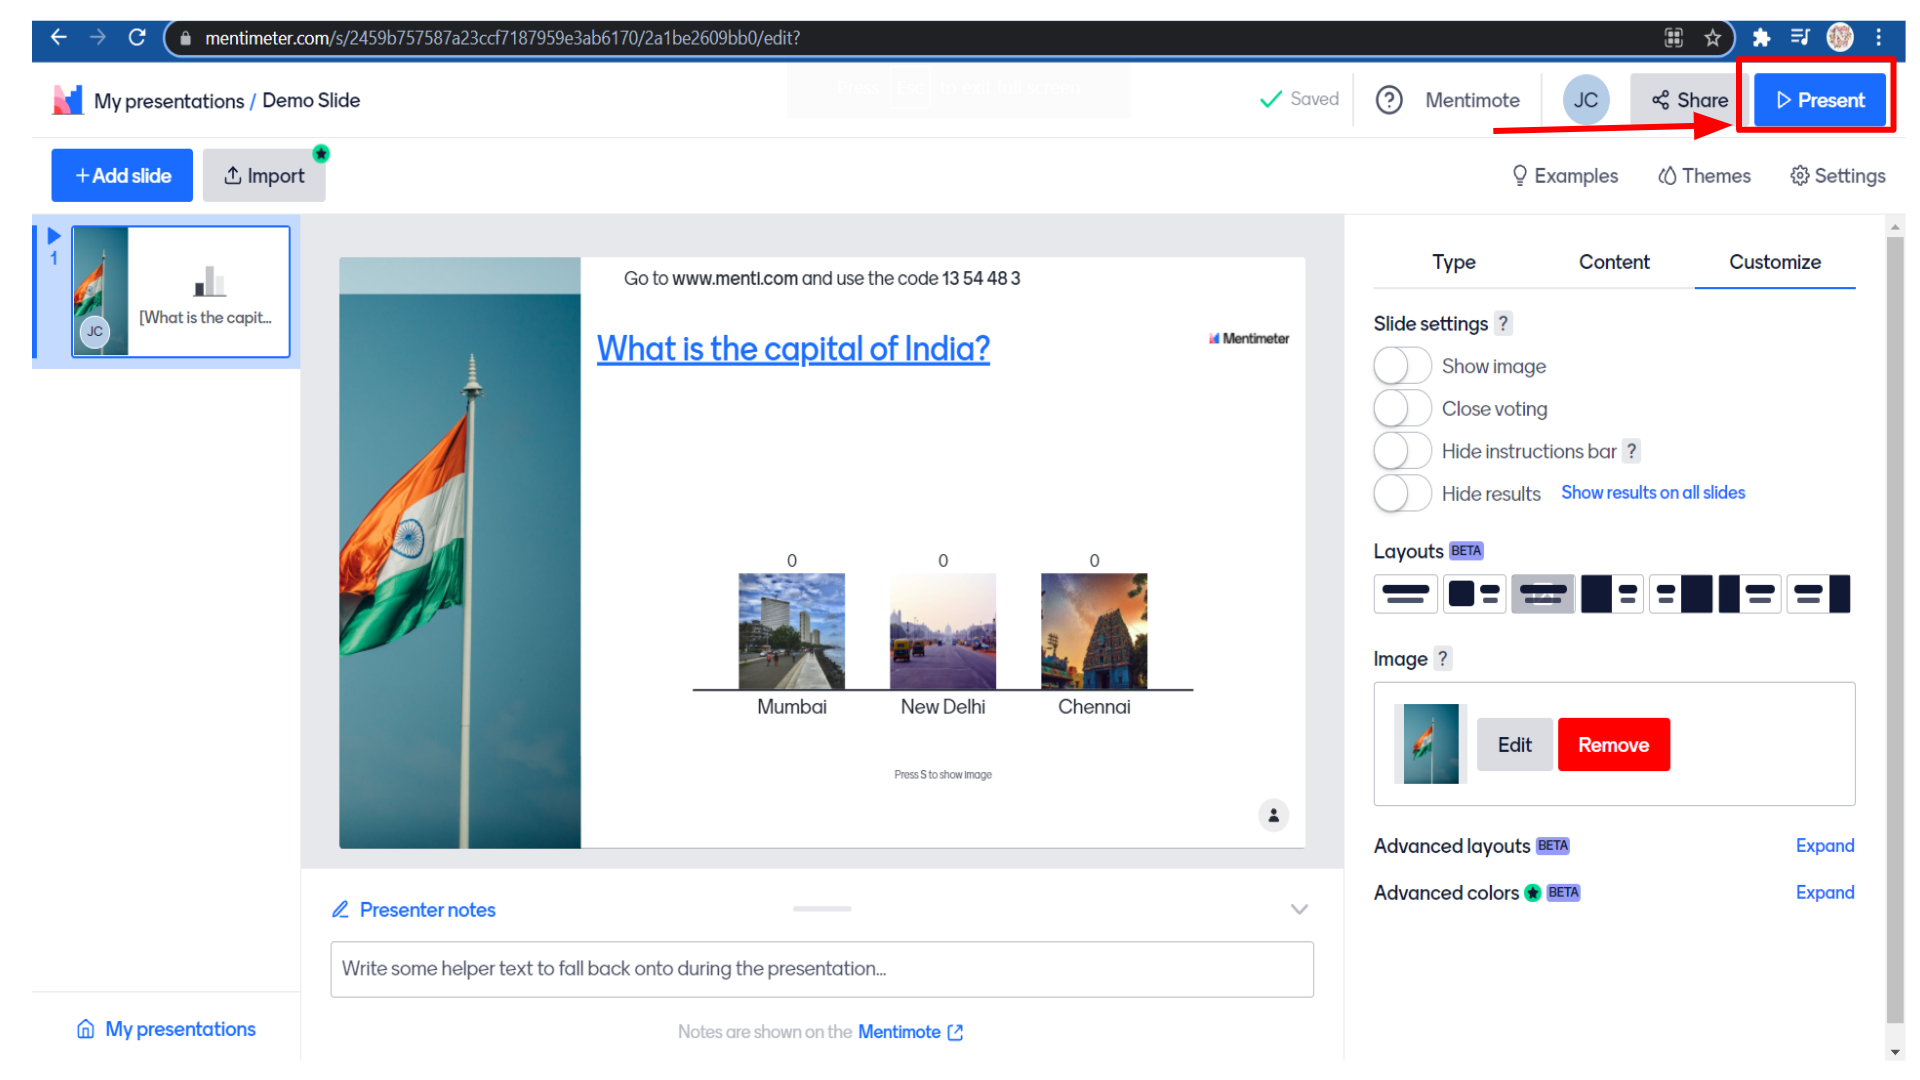 Now, we are ready to present the screen.
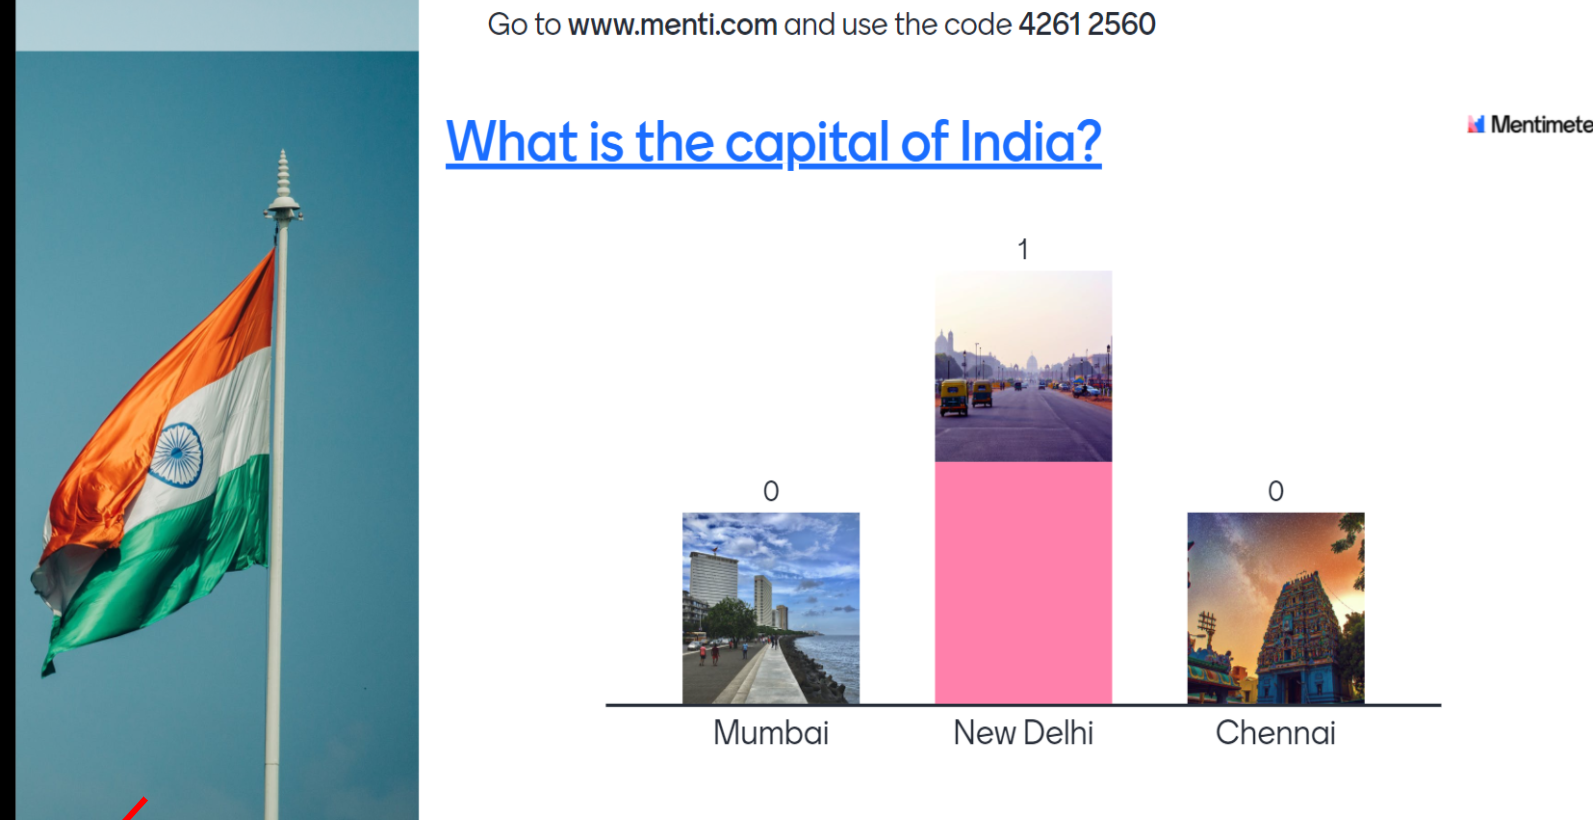
Lets’s go back to the google meet. Click on the present icon.

Click on “A Tab”.

Now we are sharing the selected tab to google meet, then click on the “share” button
 This is how your students will see on their screens
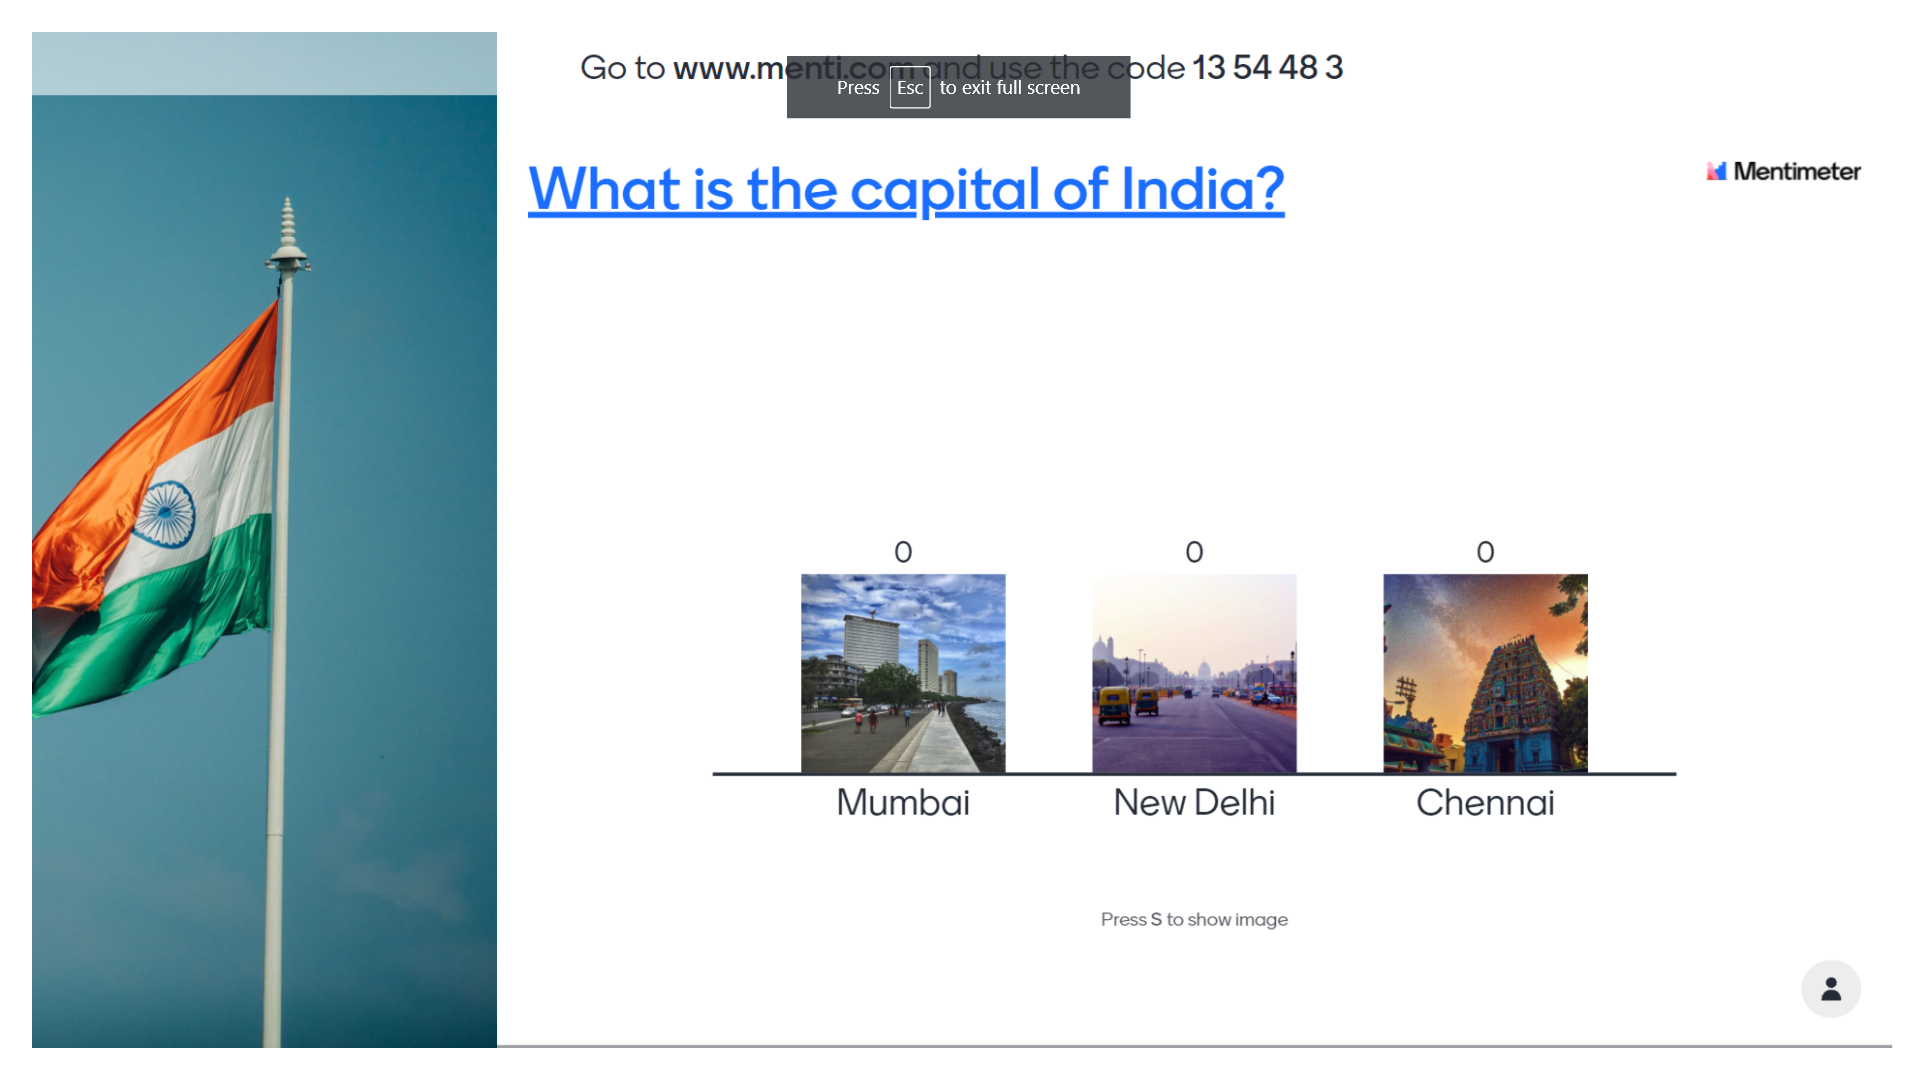
You can ask them to go to www.menti.com and type this code

Or you can copy this link and put it in the chatbox.

Now if students click on this particular link then a new tab will open and they can give their votes.

The interesting thing is that everyone will be able to see the live results.
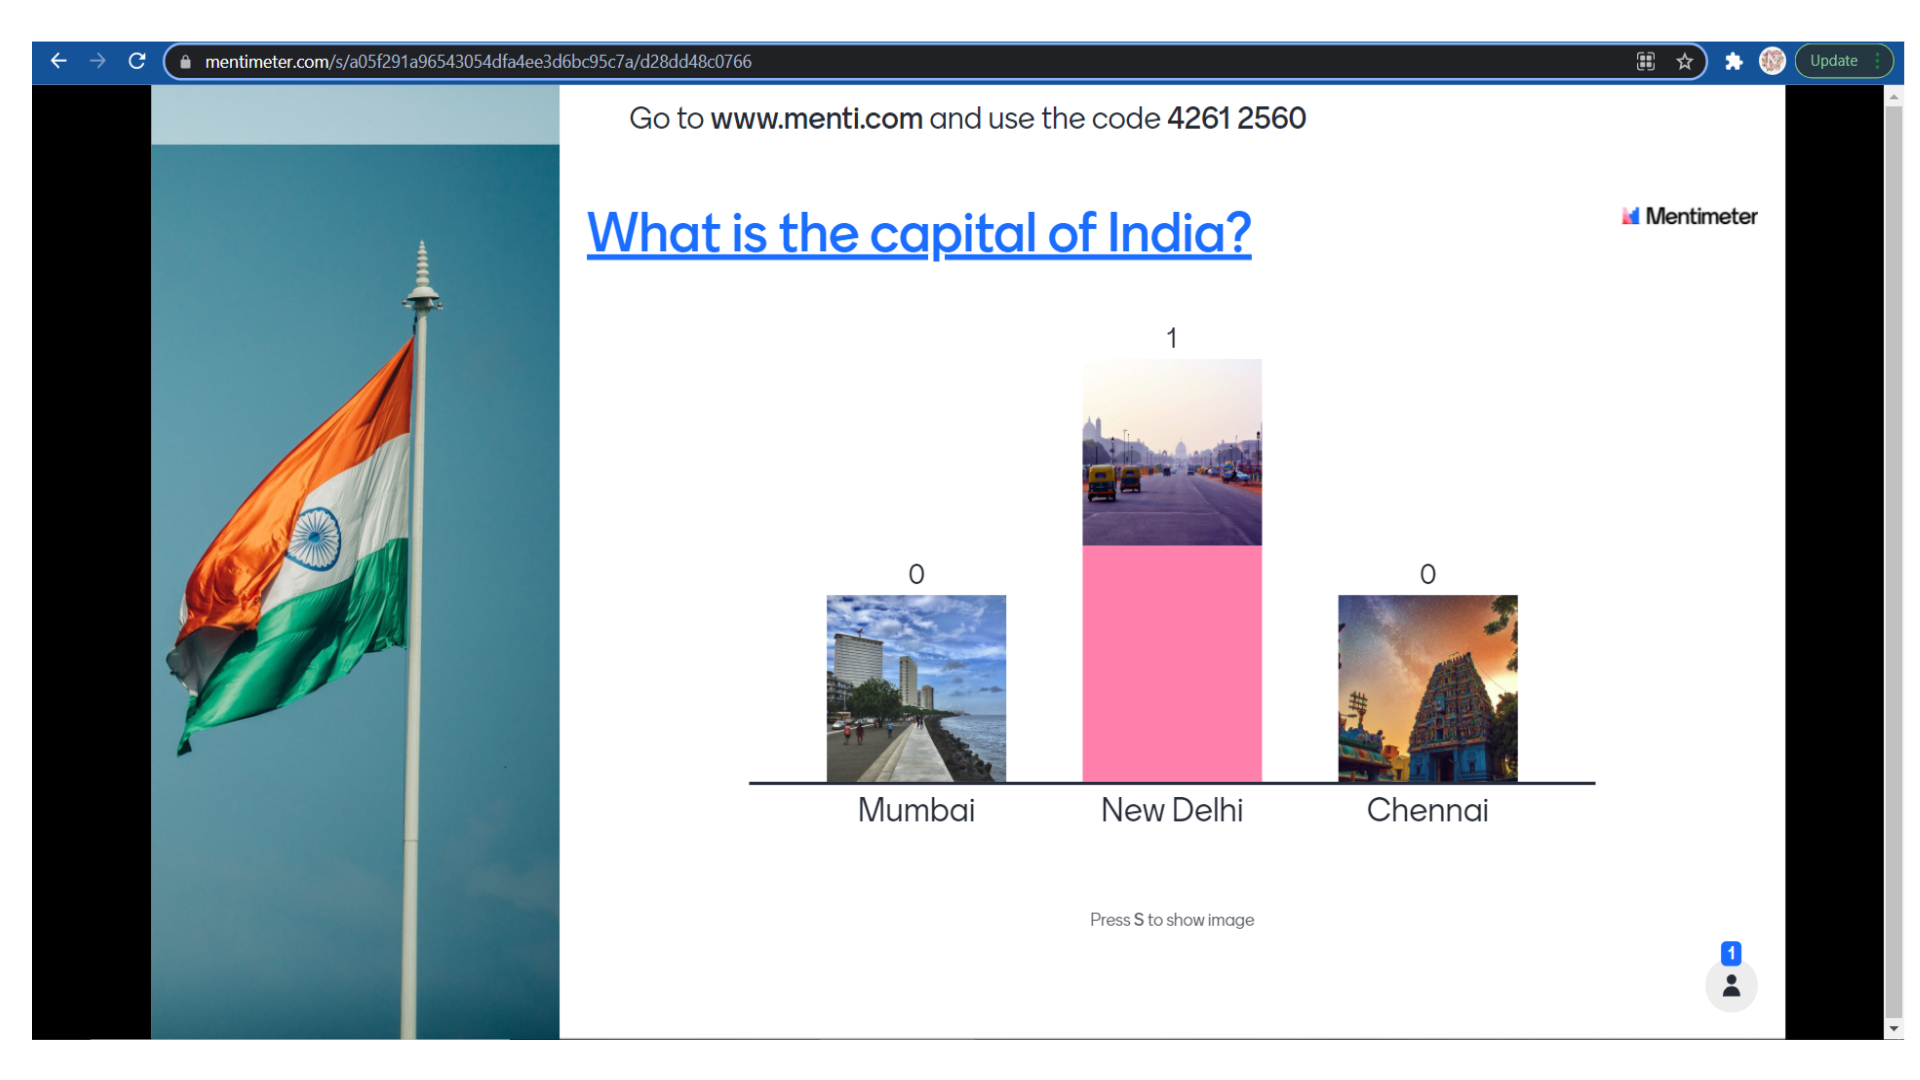
While presenting they can also click on the title and refer to the article that we have linked to the title.

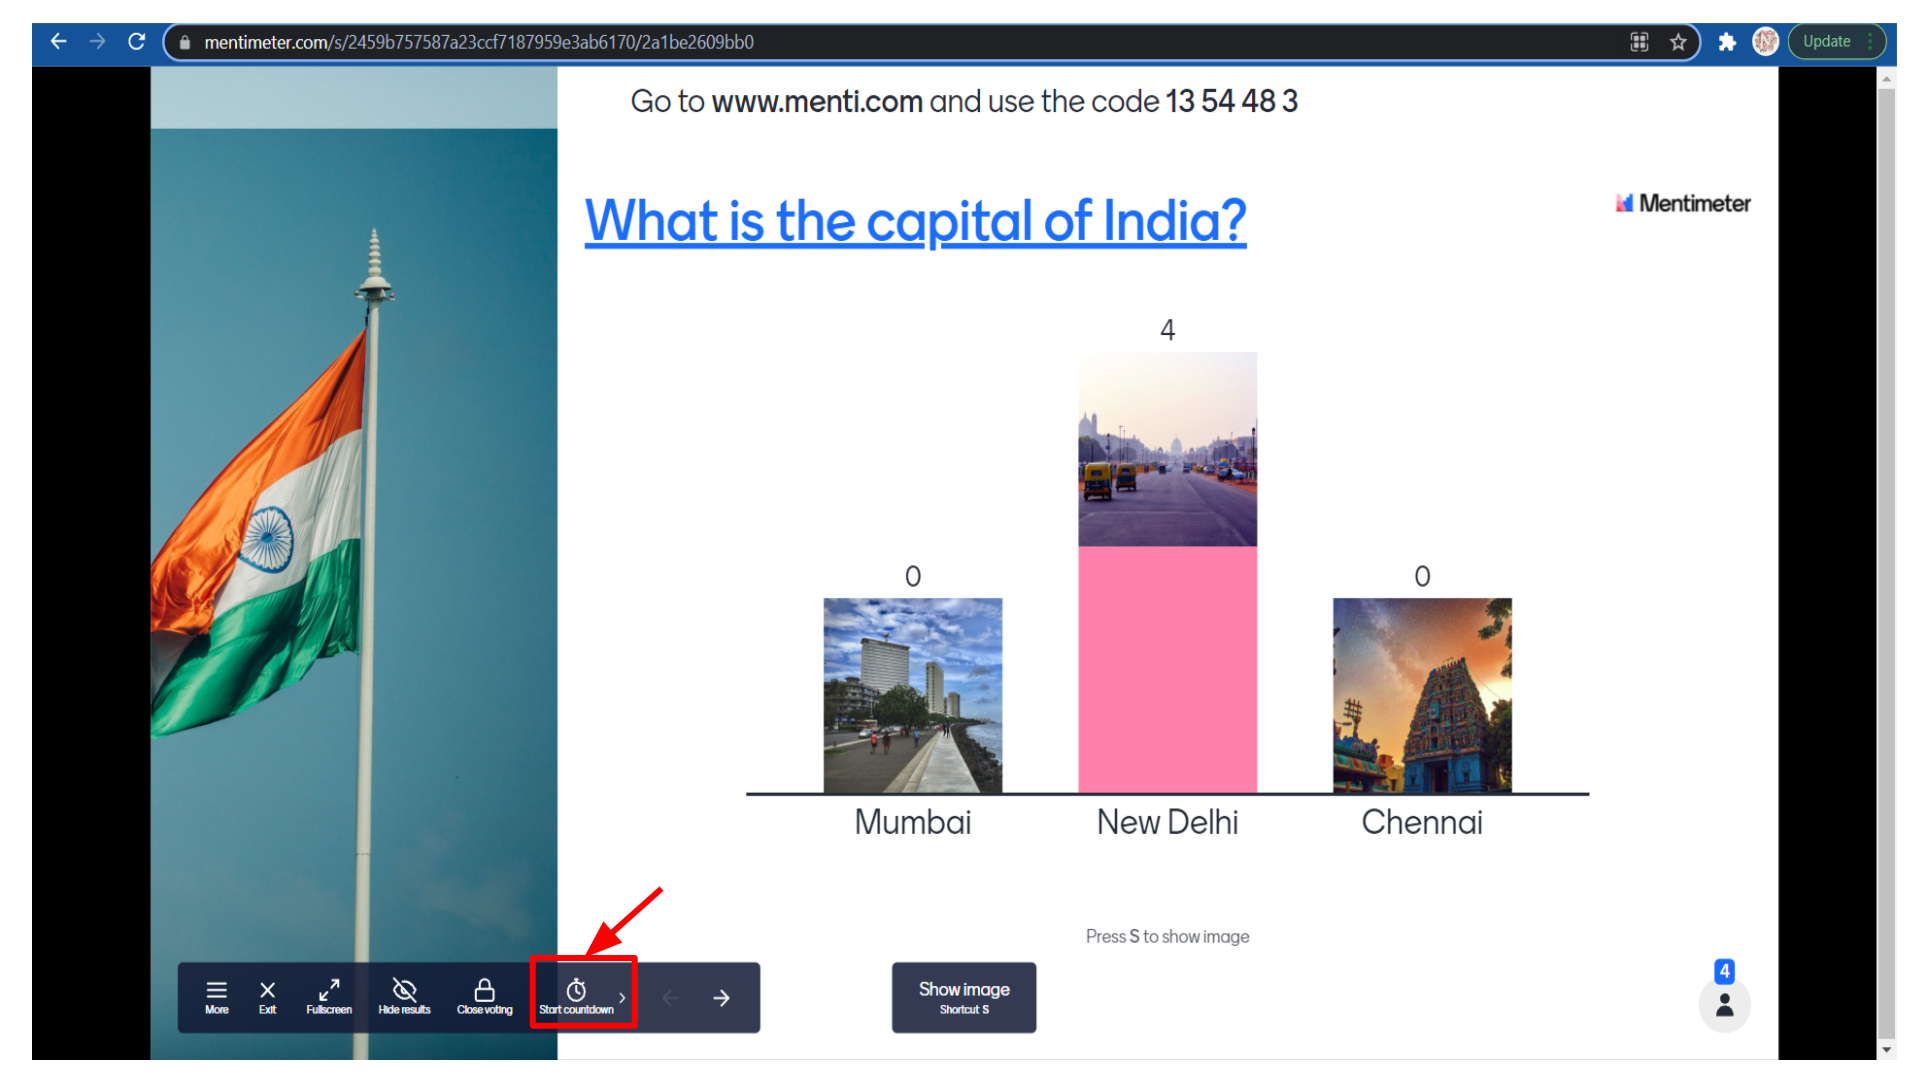
There are some more options like exit, full screen, hide results, close voting, countdown timer, etc.

So if you click on the start countdown it will automatically start a countdown timer. This feature will be very useful when you wish to give time-bounded assignments to your students.
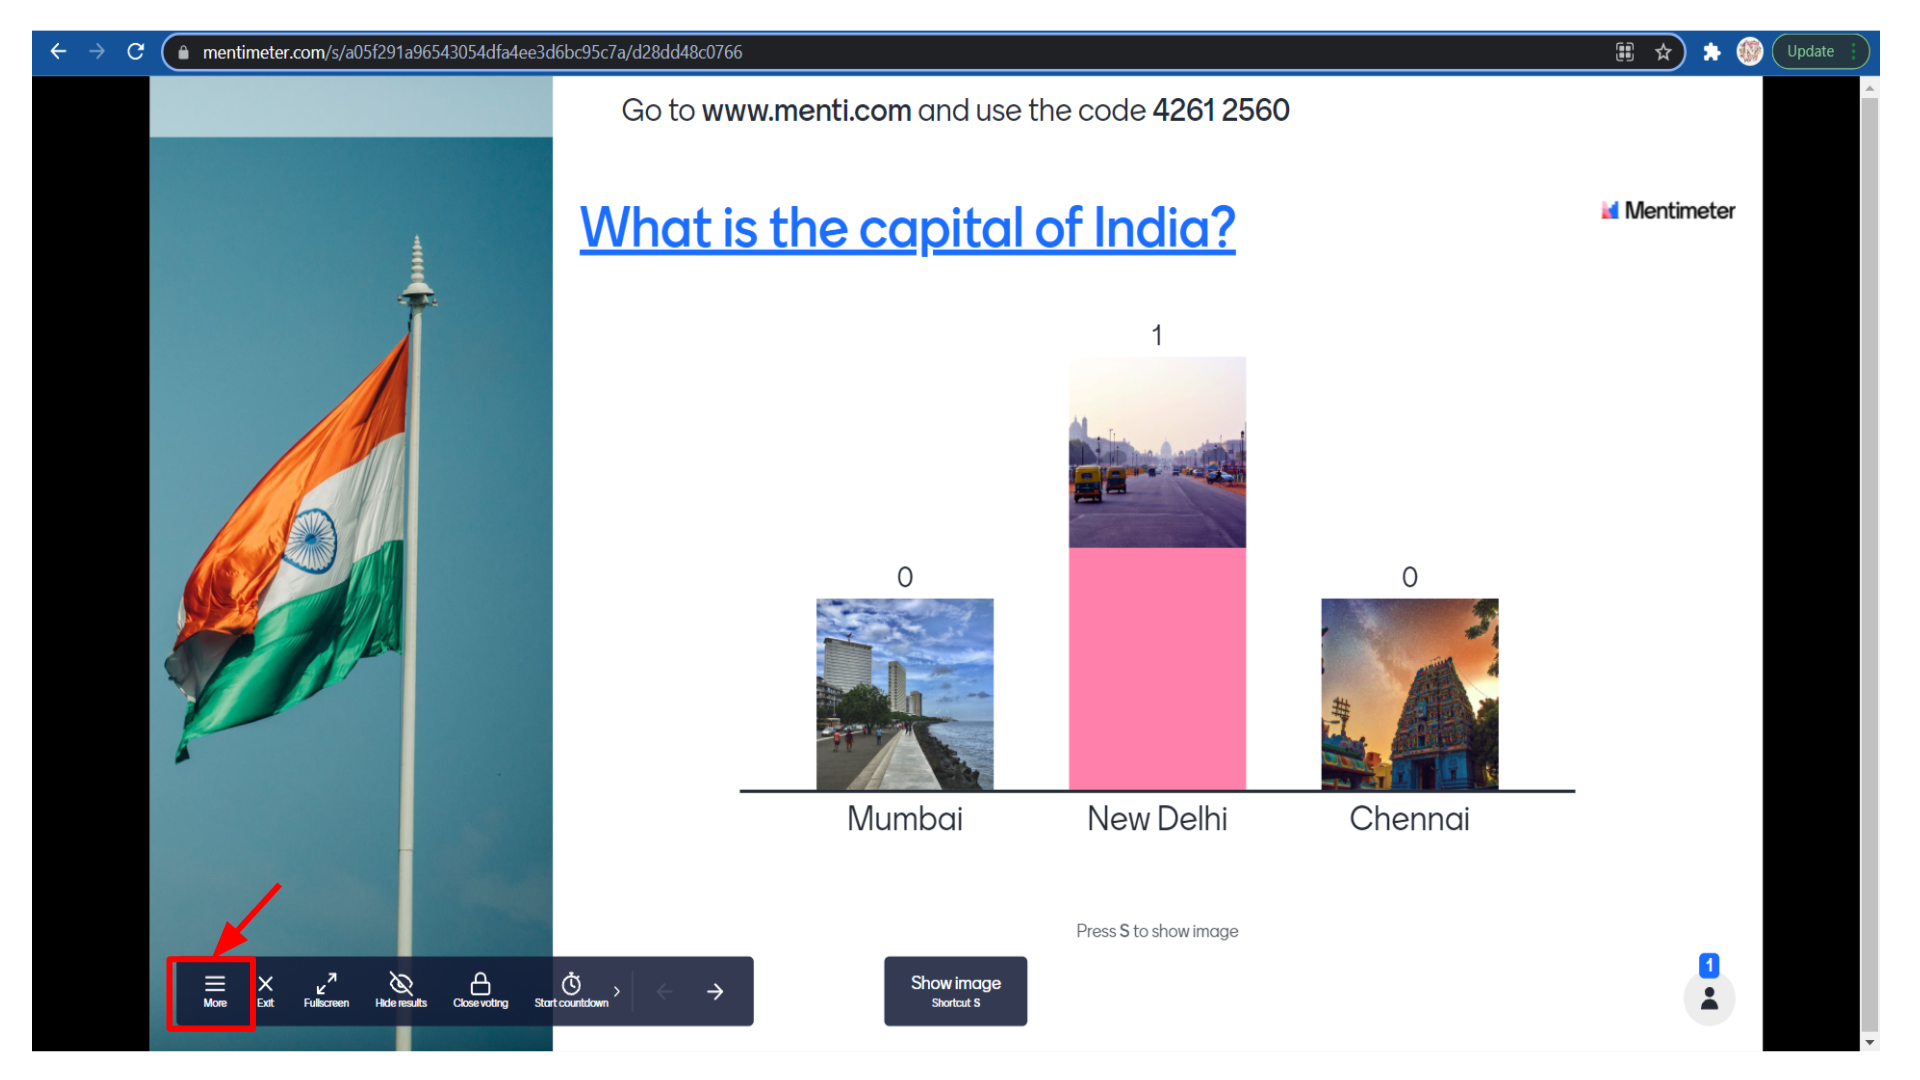
If you click on the “more” menu
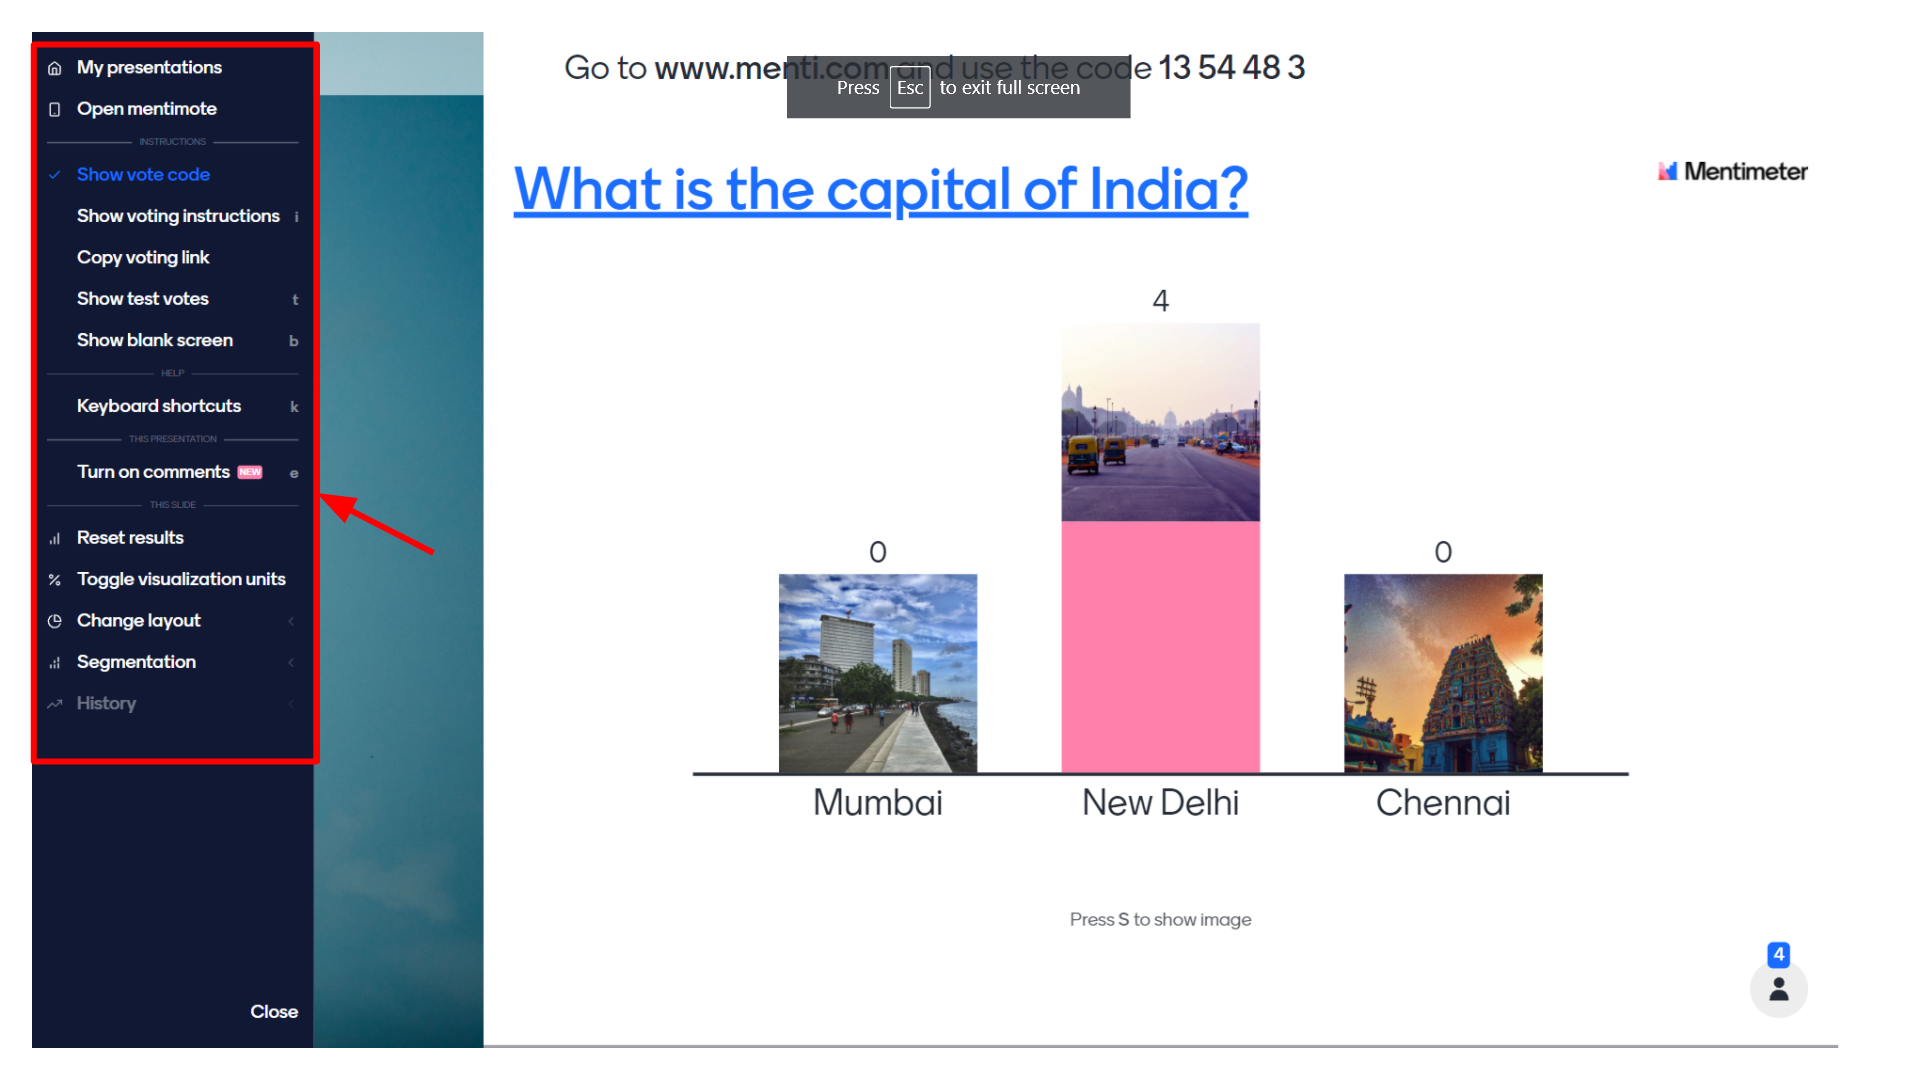
You can see so many options like my presentations, open minty notes, show voting instructions, copy voting links, show test words, show a blank screen, keyboard shortcuts, turn on comments, toggle visualization units, change the layout, segmentation, history, etc.
Once all the students answer the question you can see the results this way.
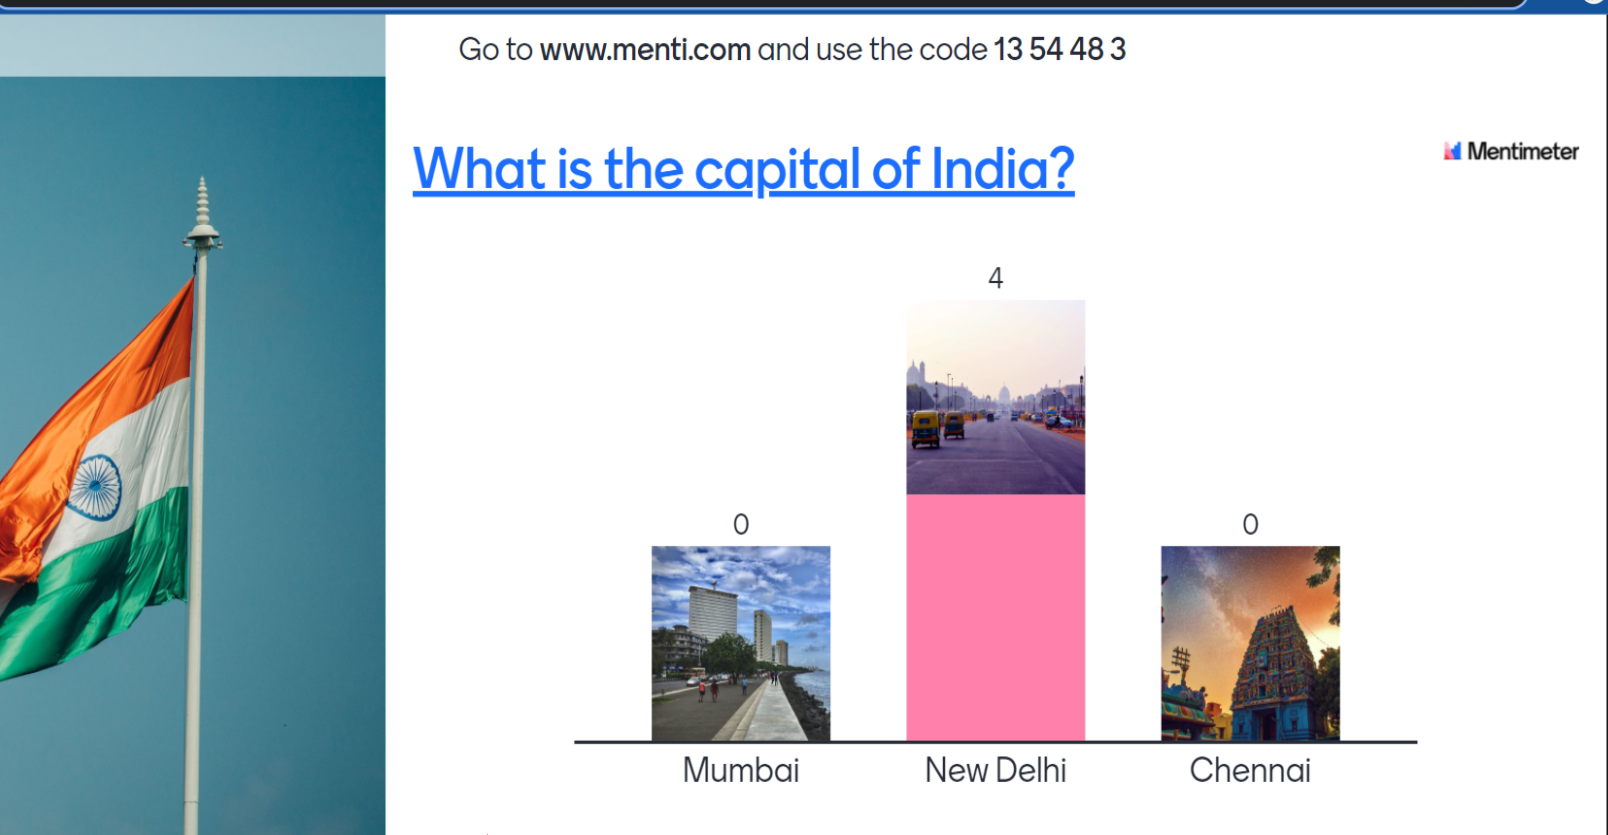
Now open the Mentimeter link in a new tab if you want to see how students will see this particular question. So they will see the image first then the question and then the options. They can select an option and click on the submit button to submit their answers.
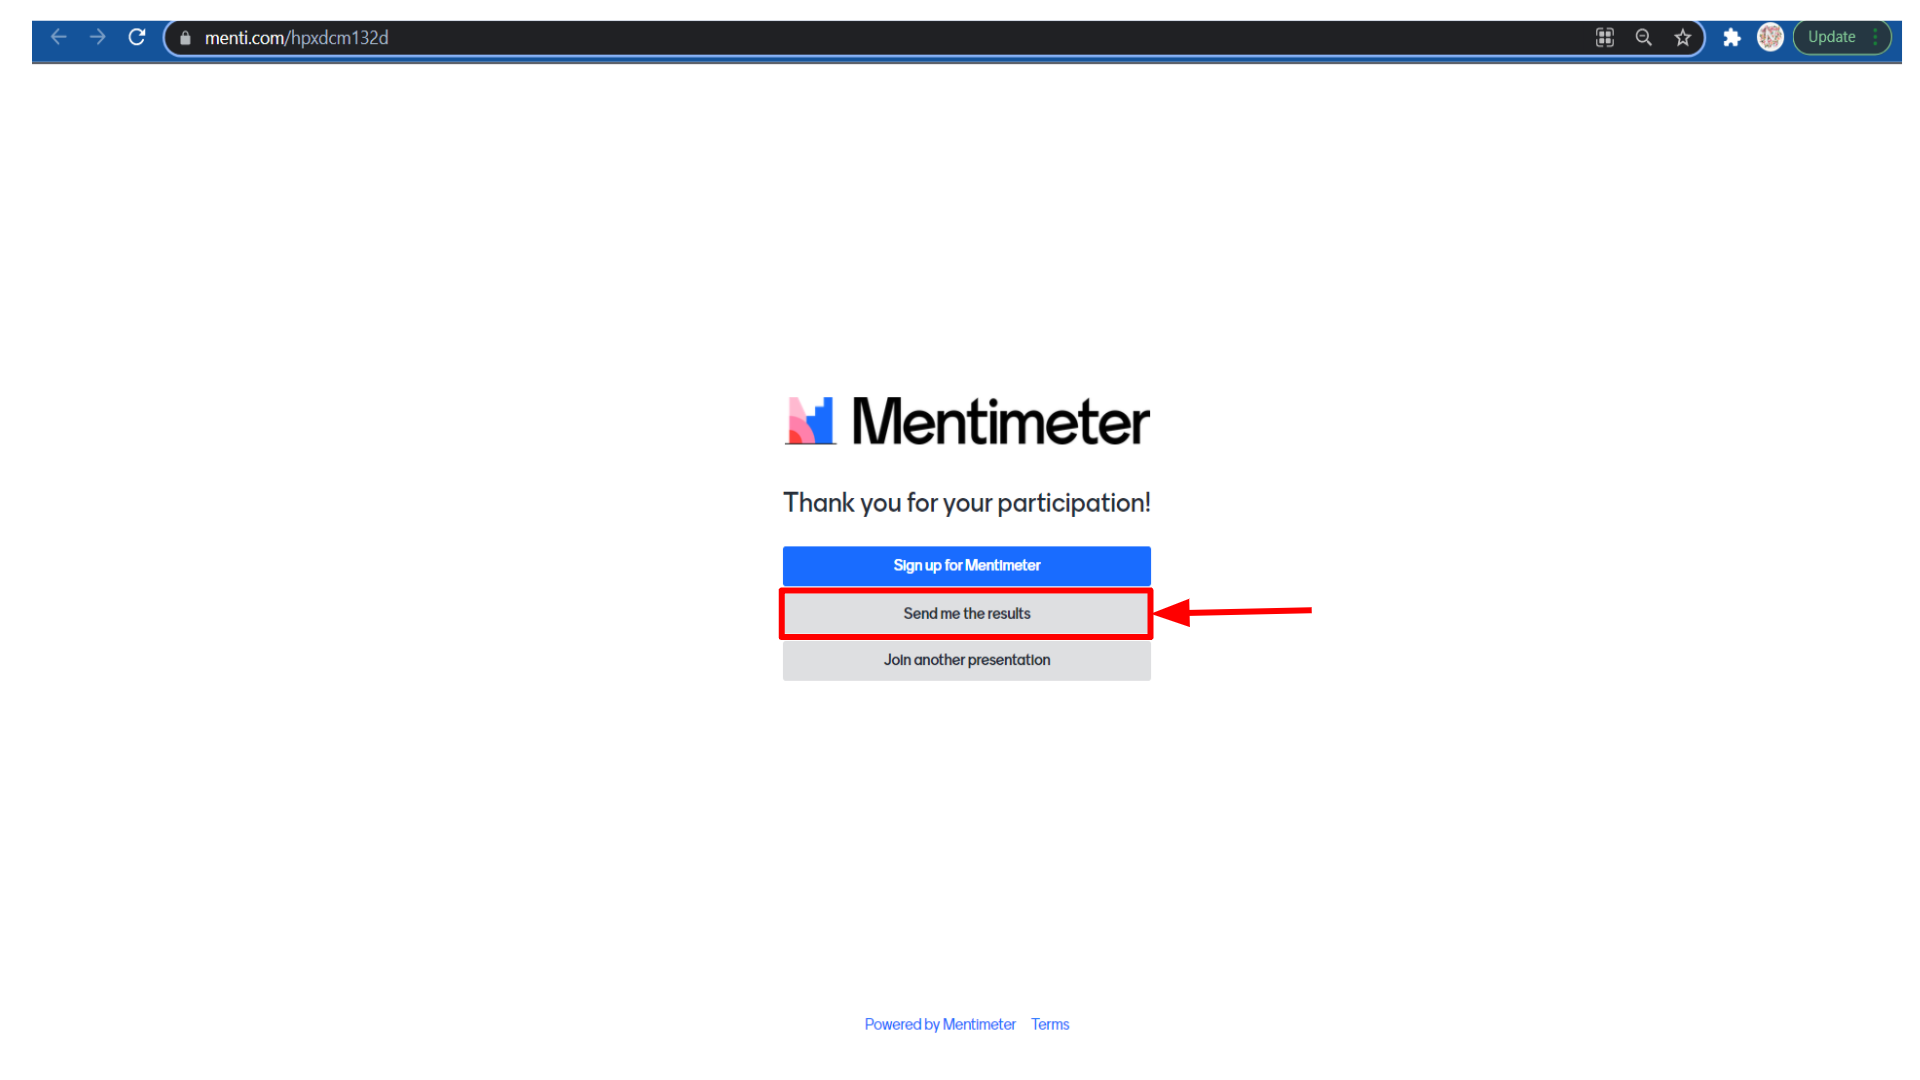
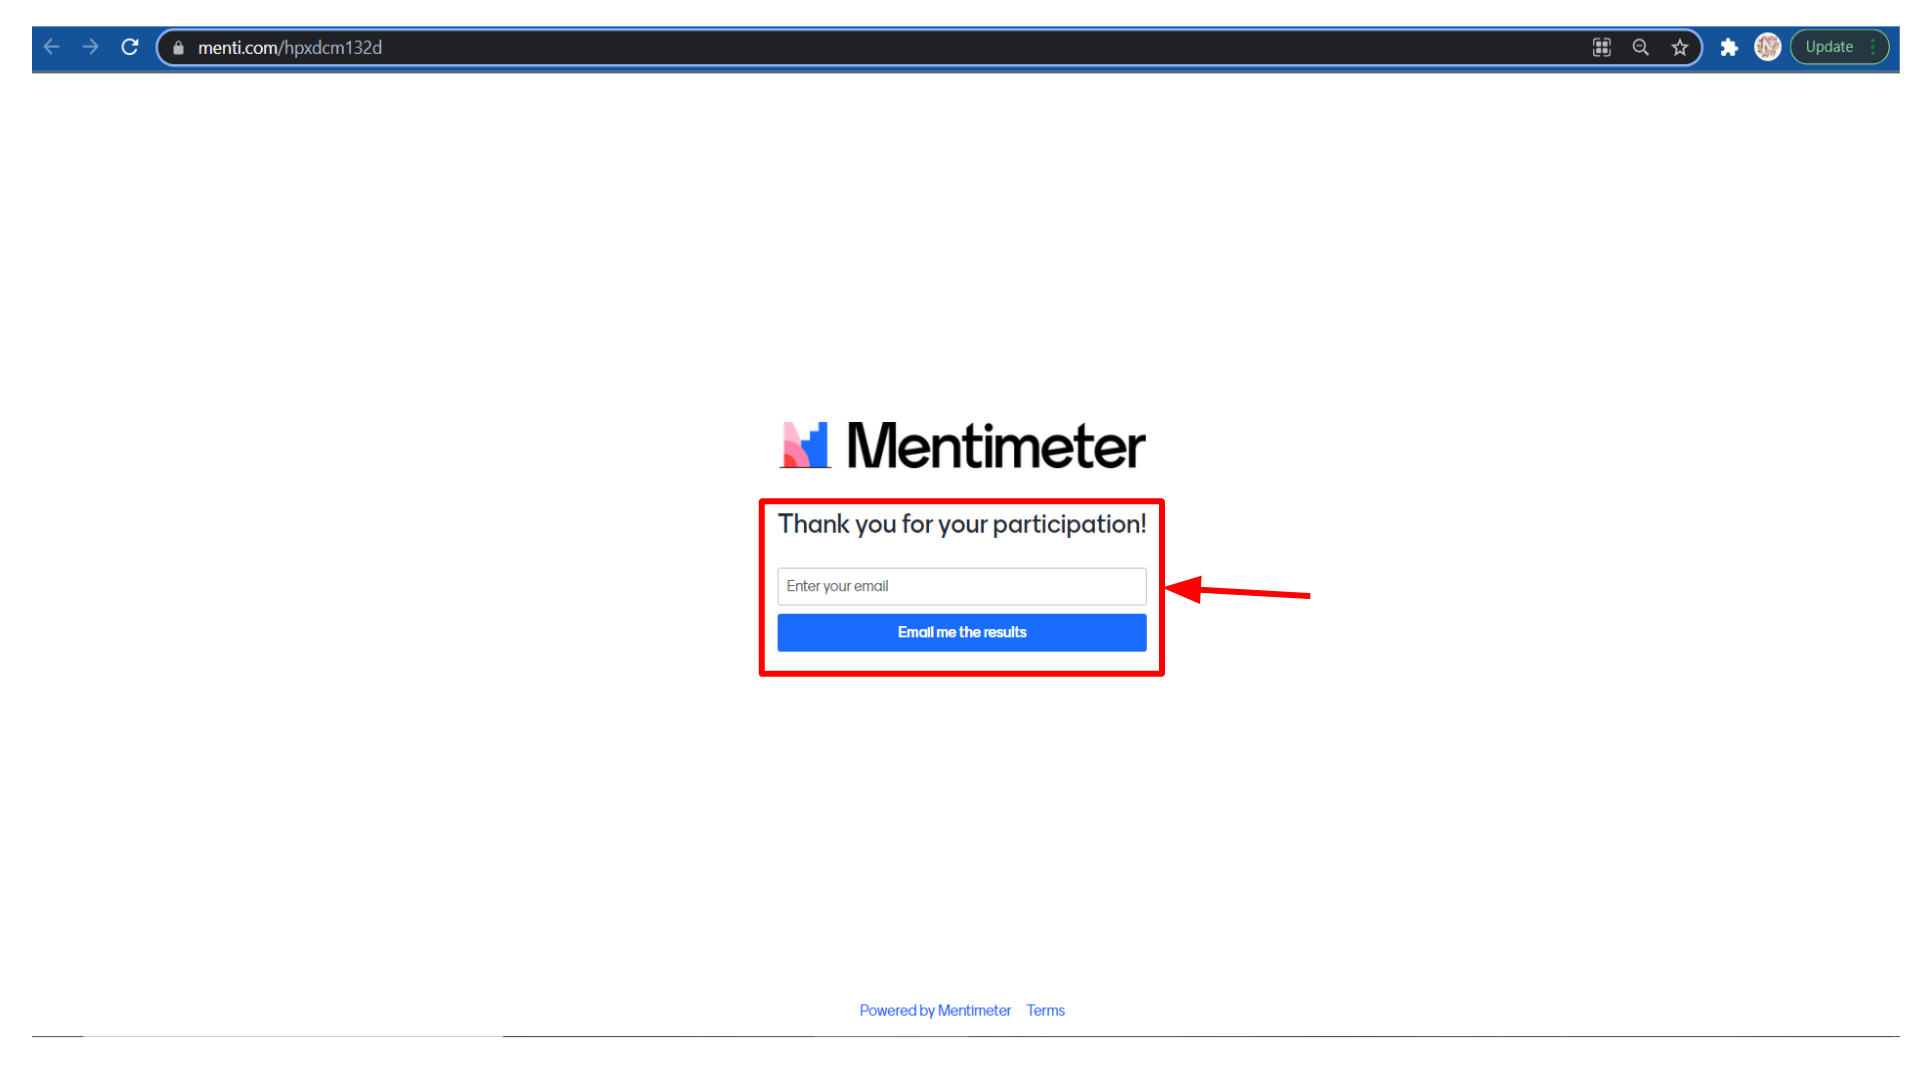
 If the student wants to see the voting results they can get it through the mail by entering the email id.
The number four shows the number of participants who have voted for this particular question.
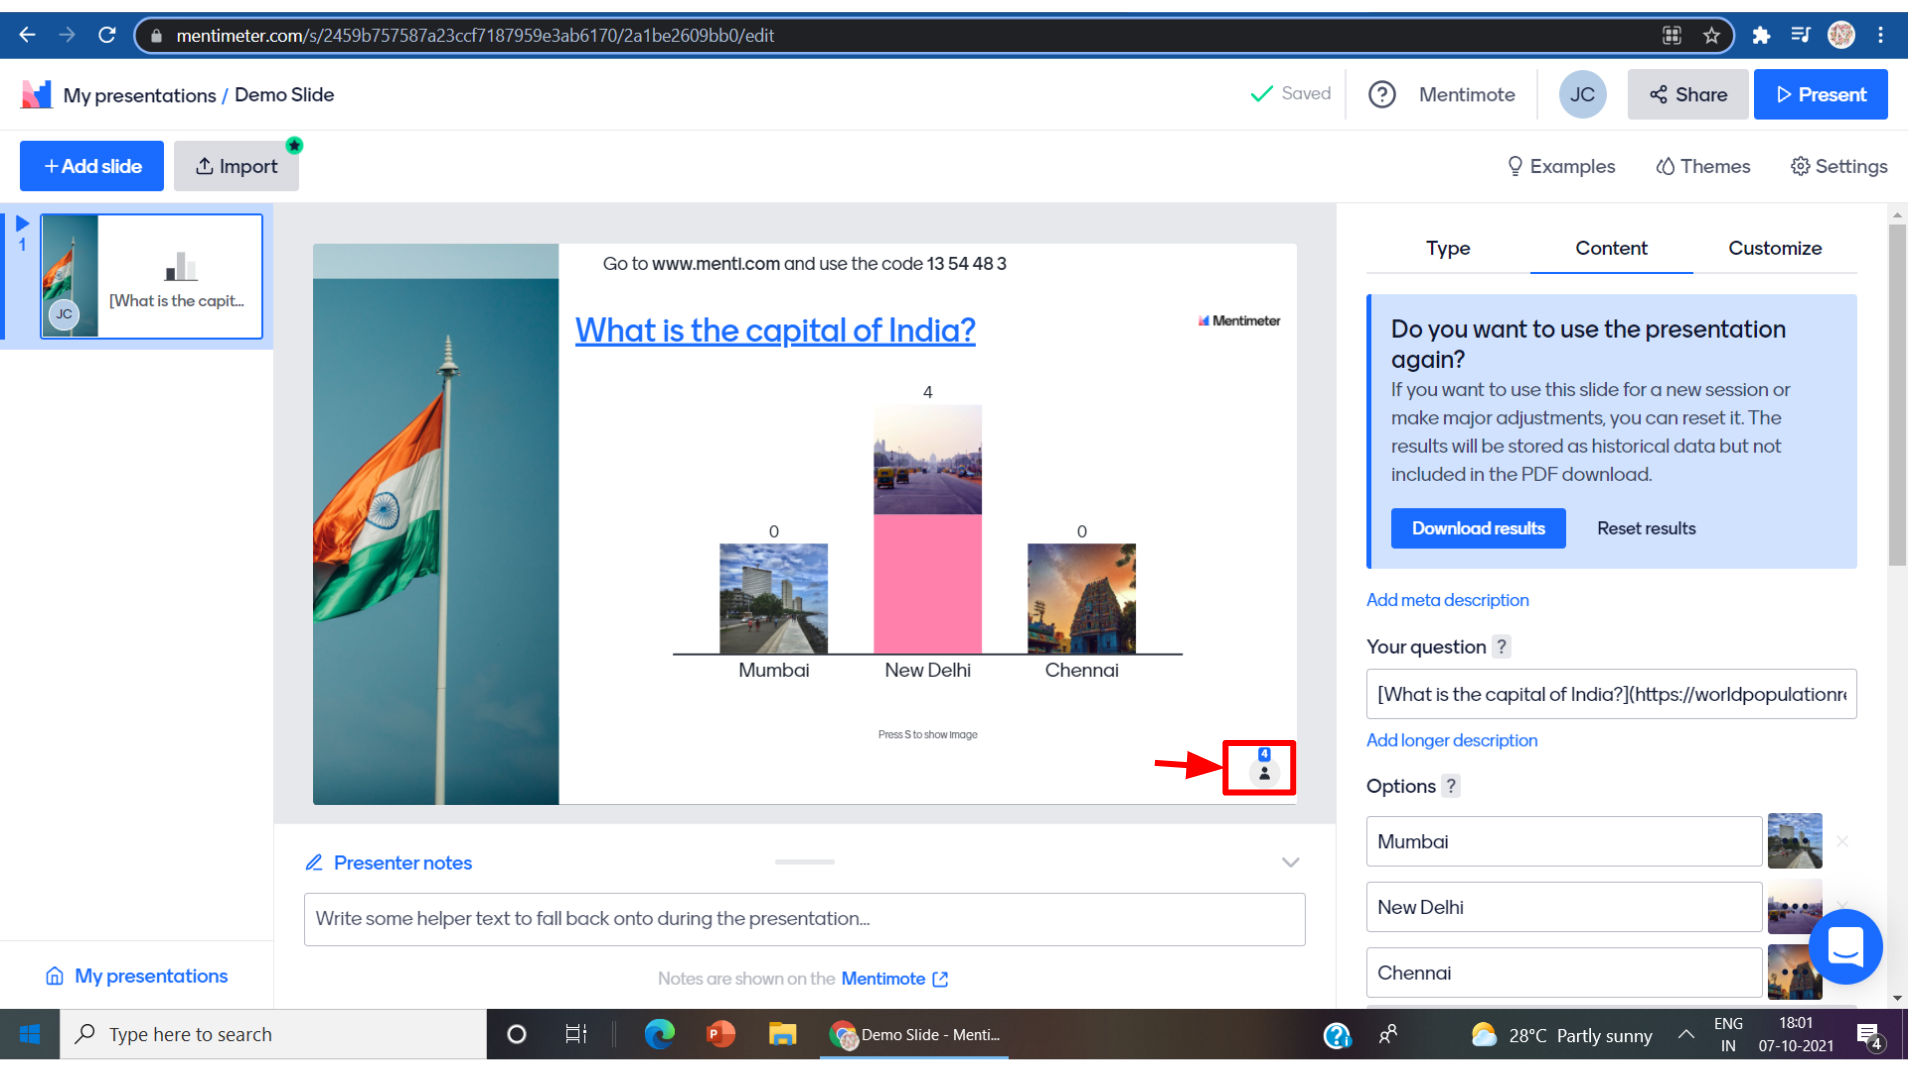
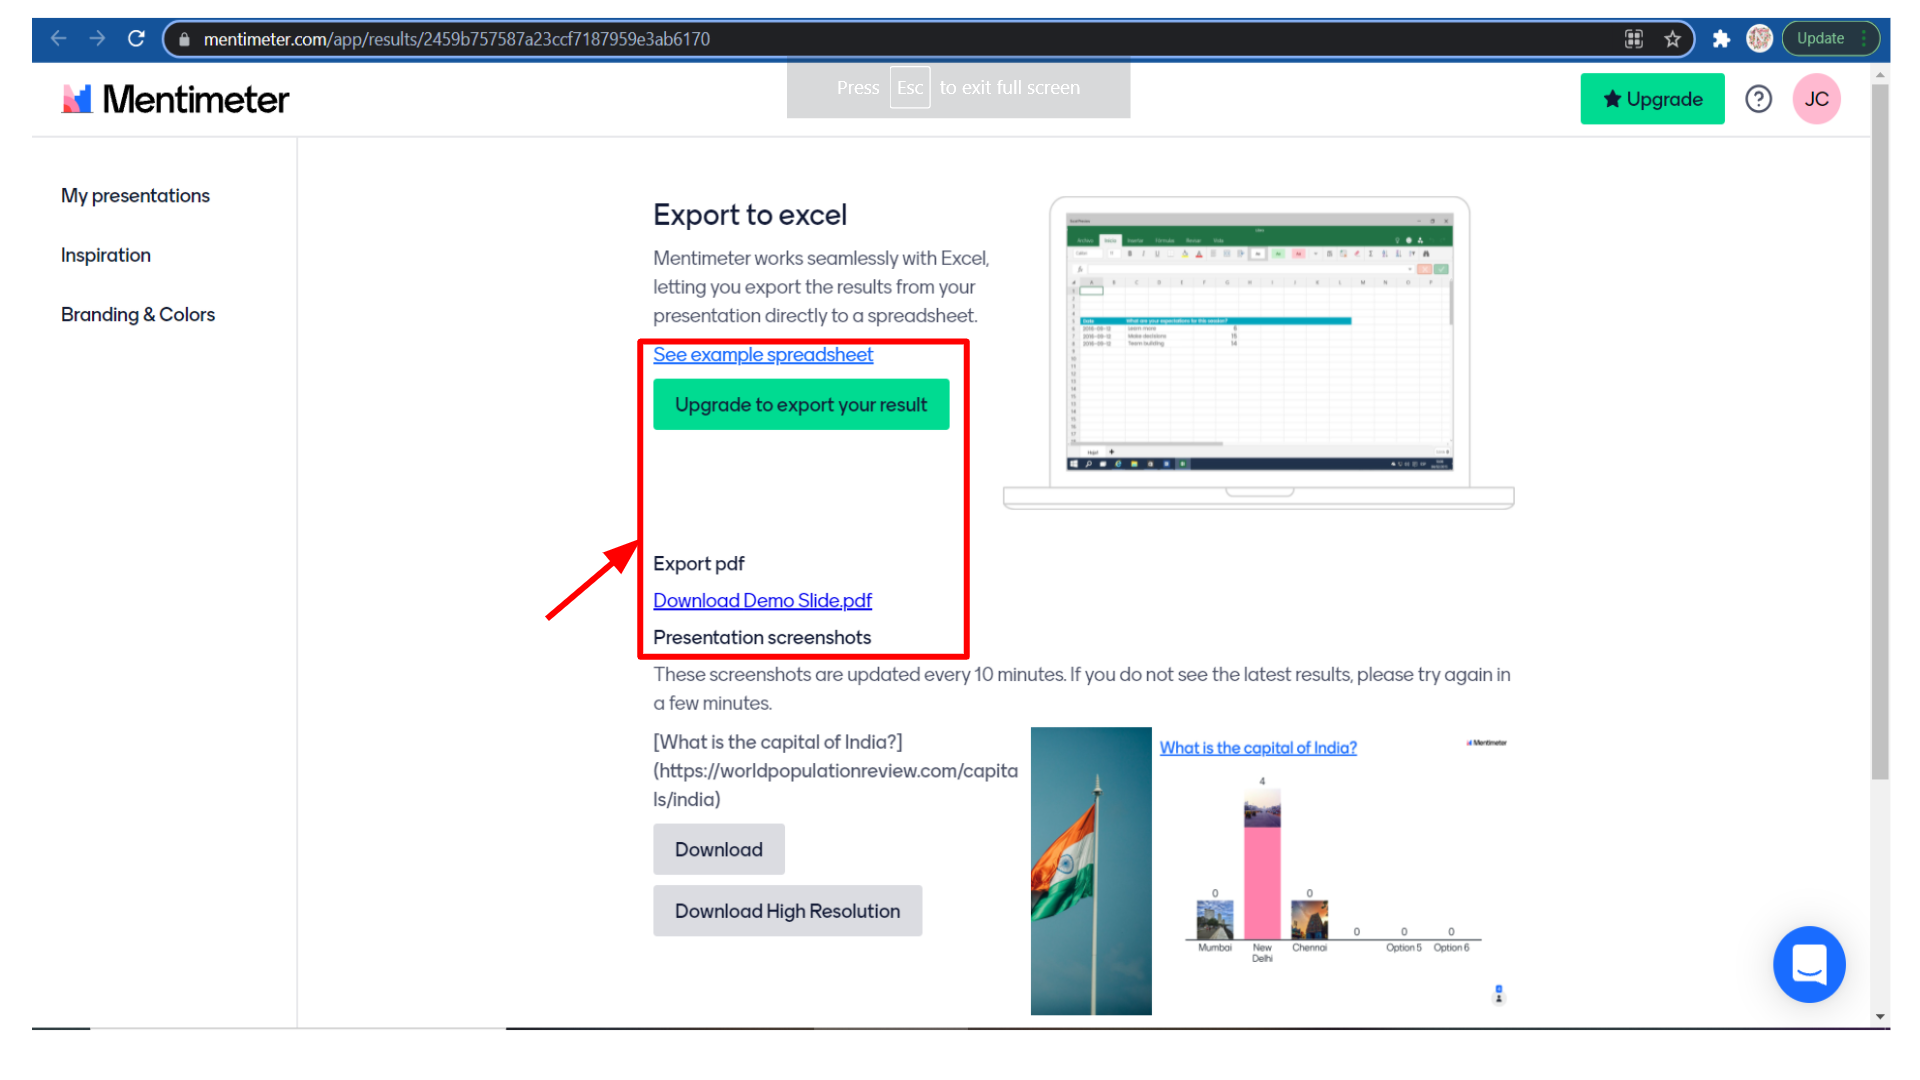
We can view the final result of the presentation and also the result can be downloaded.
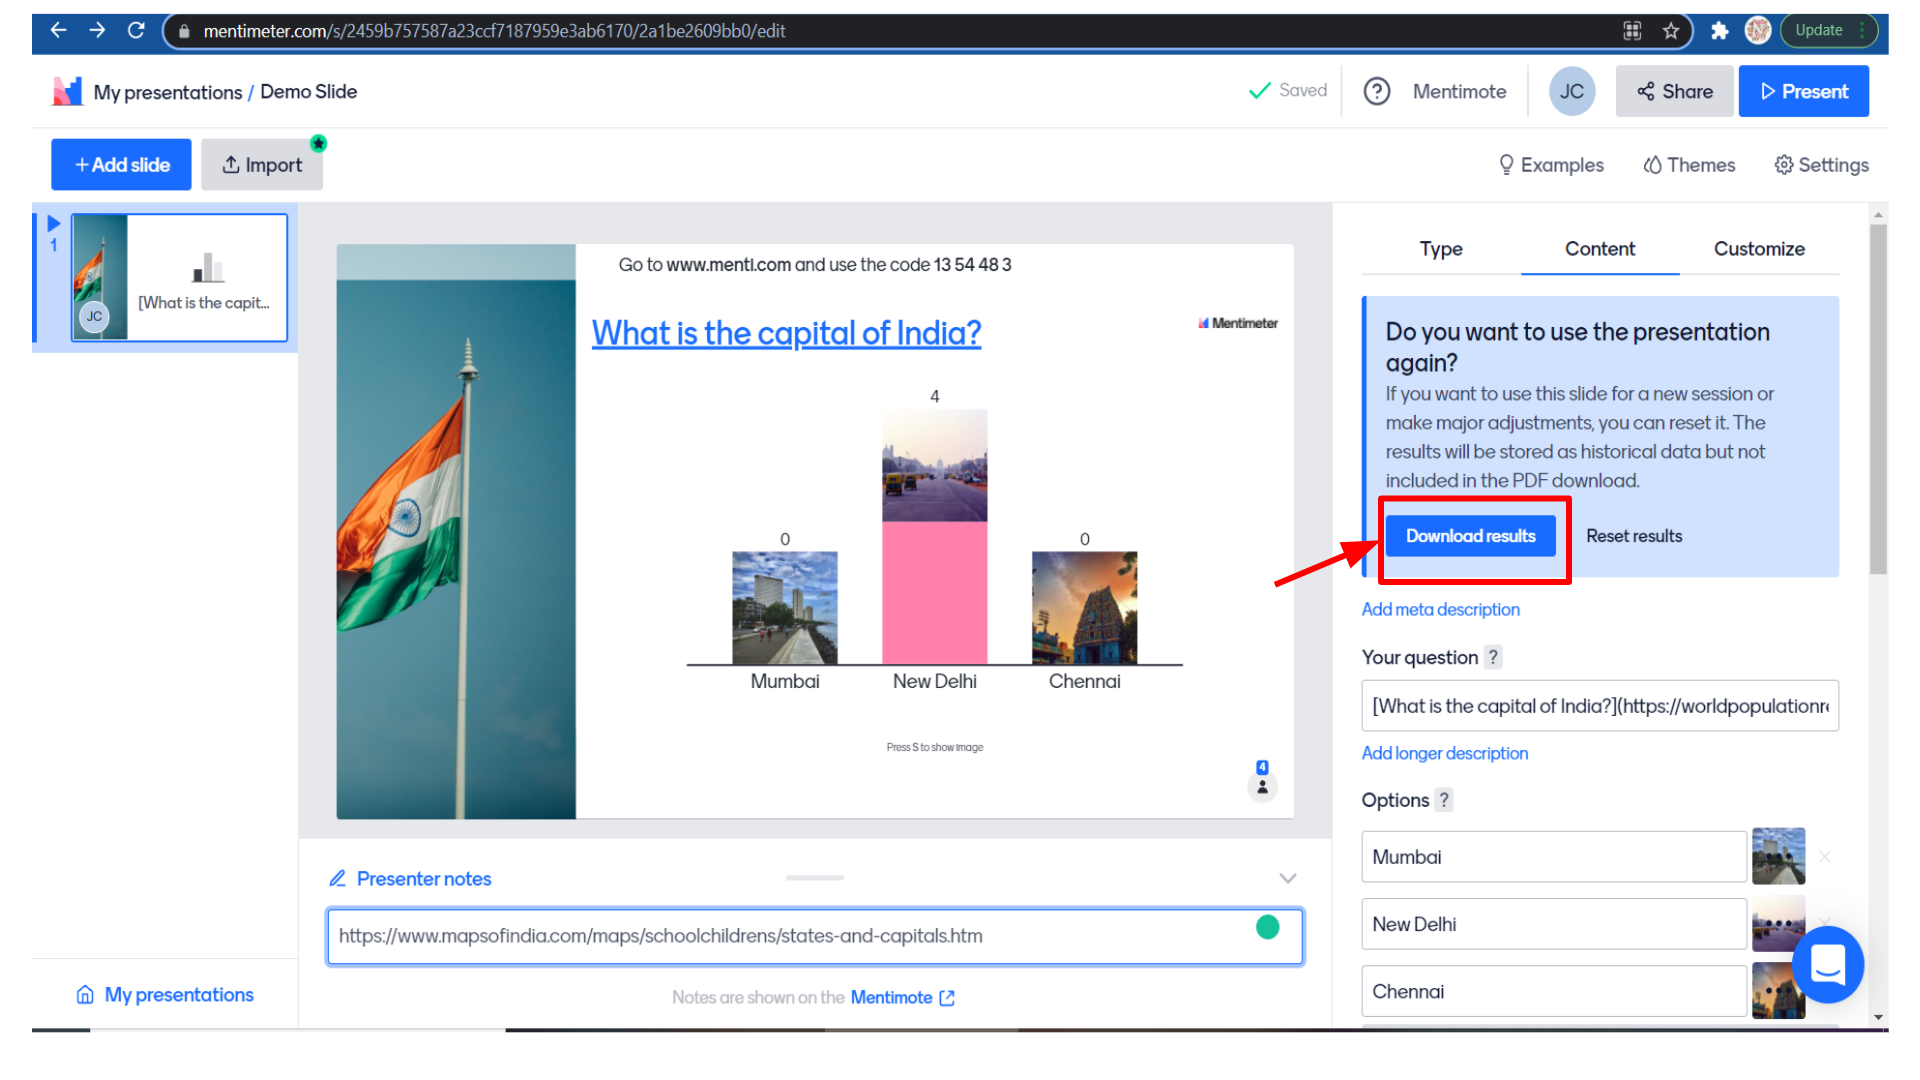 To download it as an excel sheet, you will have to upgrade your Mentimeter account but you can download it as a pdf or as screenshots in the free account itself.
You can add presenter notes in the slide below to make it easy for you to present and remember all the points during the presentation.

Now you can add a new slide by clicking on the plus add slide button.

If you select the word cloud type and the content will be according to which type of question slide we added.
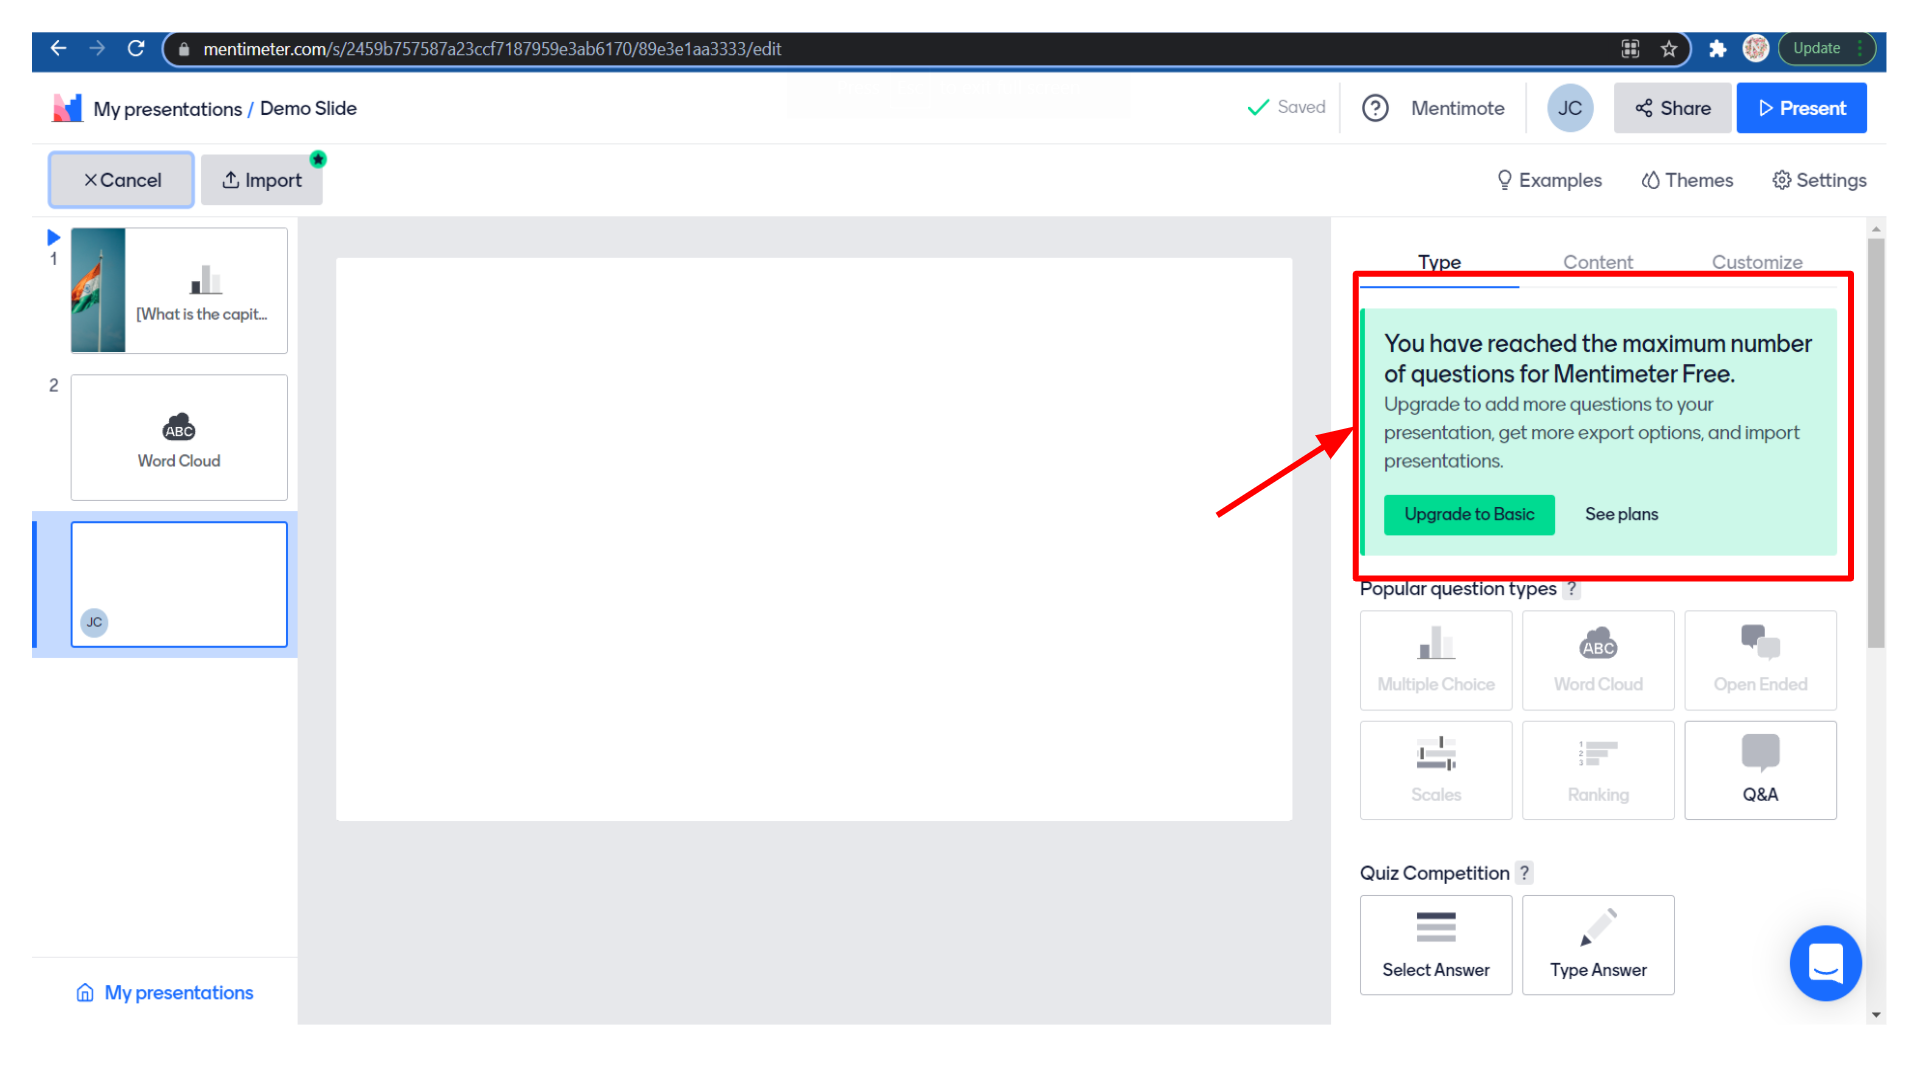
Try adding one more slide and now you will see that they are asking you to upgrade your account this is because in the free account you can create only up to two question slides and five quiz slides
There are some more options like examples, where you can get example slides. Some example slides are not accessible. You need to upgrade your account to access it and some are free to use.

If you select themes you can see different types of themes that you can set to the slide.

Finally, you have settings where you can change the additional settings of navigation, interactions, questions, and so on.

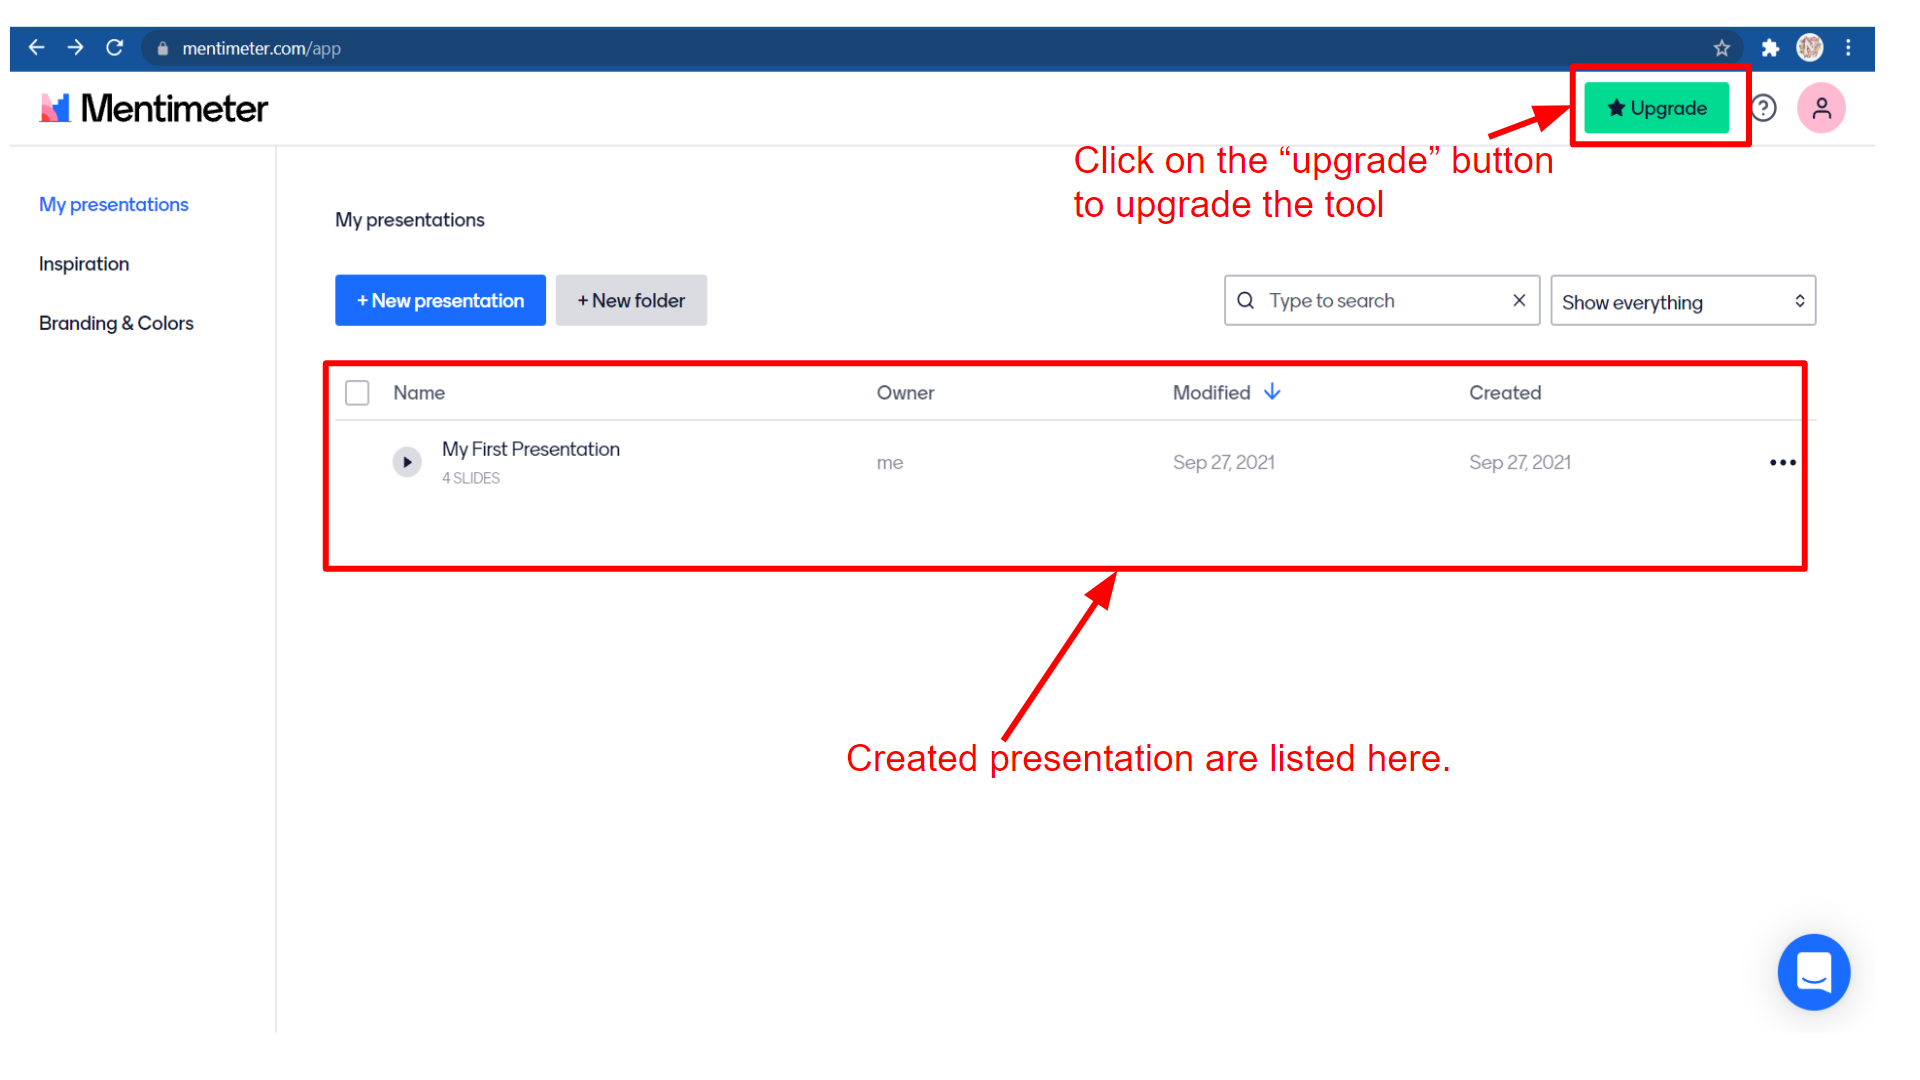
The created presentation can be viewed as a list in the tool for future reference. Using the Upgrade button, you can upgrade the tool for getting advanced features of the Mentimeter tool.
 Conclusion
To put it in a nutshell, Mentimeter is quite different from other audience engagement tools mainly because of its enchanting interface and a generous free option. Both the number of presentations and the number of users in the audience are not capped by the Mentimeter.
Moreover, Its free option is an attractive feature, so it is perfect for its most useful applications. Through the short introductory or summative interactive slides will support the learner engagement and by providing an effective warm-up task, icebreakers, summaries, or low-stakes anonymous assessments at various proficiency levels
For both online and classroom teaching, Mentimeter is a more supportive addition to any educator’s digital tool kit besides, time-efficient, visually appealing, and easy to set up are the advantages of Mentimeter.
Check out some Creative Ways of Using Mentimeter
.
Join us for FREE to get instant email updates!

Simplifying CO–PO Mapping in Outcome-Based Education Accreditation by the National […]

The National Institutional Ranking Framework (NIRF) 2025 results are out, […]

What the Top 100 Rankings Reveal About India’s Universities The […]

Exploring patterns, trends, and the evolving landscape of technical education […]

Release date: September 4, 2025 Source: NIRF portal’s Overall Top-100 […]
Leave A Comment